We don't just develop apps; we engineer experiences, innovate
solutions, and redefine possibilities. With a legacy of over a
decade, our commitment to excellence, cutting-edge technologies,
and a talented team of professionals is what sets us apart.
So, you’re working on building a mobile app and deciding on the best tech stack to use? It may sound like a small decision, but trust me, it’s a big deal. The mobile app tech stack – a combination of programming languages, frameworks, tools, and platforms – lays the groundwork for building and running your app. This choice is pivotal: it influences everything from cost and development speed to performance and maintenance. Also, let’s remember about user experience and making sure your app stands the test of time.
So, what are your choices? Well, there are three main ways to develop a mobile app stack: native, hybrid, and cross-platform. Each one has its own advantages and disadvantages, and the best choice for your app will depend on what you need and what you want to achieve.
In this blog, we dive deep into the intricacies of choosing the most suitable mobile app tech stack. We’ll explore the various components that make up a tech stack, compare the differences between mobile and web app technology stacks, and outline the key considerations that should guide your decision.
Mobile App Development Statistics for 2023
When you’re figuring out the best mobile app tech stack, it is important to know what’s popular and effective. Here are some simple insights:
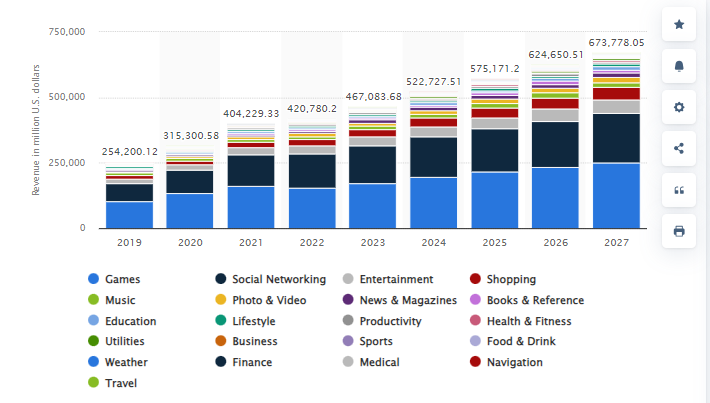
According to Statista, the mobile app industry is projected to generate more than $935 billion in revenue by 2023.
The Apple App Store has 1.96 million apps, while the Google Play Store has 2.87 million apps available for download, giving you an idea of the competition.
In 2023, people spend 90% of their smartphone time on apps, which averages to about 2 hours and 51 minutes.
Free vs. Paid Downloads
When you are creating a mobile app, one of the most important things to consider is how you’re going to make money from it. If you decide to charge people for downloading your app, consider whether people will actually be willing to pay for it. Most apps that people download these days are actually free. According to research, mobile users generally don’t expect to pay for app downloads, especially since there are so many free apps available on the Apple App Store and Google Play Store.
Many mobile users who are used to accessing free app downloads may prefer to avoid paying for the same. However, it’s worth noting that free apps generate 98% of all app revenue. Therefore, offering apps for free can still be a profitable business strategy. In-app purchases are a great way for mobile app developers to monetize their apps.
As such, developers can launch both paid and free apps. However, not all apps should be paid for. Business owners can enhance their customer’s experience by offering free app downloads as an extension of their business.
Why Mobile App Tech Stack is Important?
Now that we have an overview of mobile app stats in 2023, let’s get down to one of the crucial parts, which is why selecting the right mobile app tech stack is important.
The selection of mobile app tech stack is not just a technical decision but a strategic one as well.
It affects not only the mobile app development process but also the long-term maintainability and scalability of the app.
A well-chosen tech stack ensures that your app is robust, responsive, and ready to meet the evolving demands of users and keep up with the technology trends.
Whether you’re a budding entrepreneur, a seasoned developer, or a business strategist, understanding the nuances of a mobile app tech stack is crucial in today’s tech-centric world.
Understanding the Mobile App Tech Stack
The world of mobile app development can be complex, especially when it comes to choosing the right technology stack. Understanding the mobile app tech stack is critical for creating an app that is not only functional but also efficient and user-friendly.
What is a Tech Stack?
A mobile app tech stack is like a set of tools that developers use to build a mobile app. It includes programming languages like Swift for iPhones or Kotlin for Androids, the frameworks for creating the app’s appearance and behavior, the special software used for writing code like Xcode for iOS app development or Android Studio for Android app development, and other tools for managing the app’s data, connecting it to the internet, and making sure it works well. It’s like a recipe that developers follow to create a mobile app.
Front-End
Font end is the user interface of the app, the part that users interact with. It includes everything the user experiences directly, from graphics and page layout to user navigation. Technologies commonly used for front-end development in mobile apps include HTML, CSS, and JavaScript.
Back-End:
The back end is where the app’s core logic lives. It’s responsible for server-side operations, database management, and user authentication. This part of the stack isn’t visible to the users but is the backbone for the app to function. Technologies for back-end development can vary, including programming languages like Python, Ruby, or Java, frameworks like Django or Rails, and database systems like MySQL or PostgreSQL.
Platform:
The mobile platform is the operating environment in which the app runs. Major mobile platforms are iOS and Android, each requiring specific development tools and programming languages like Objective-C, Swift (for iOS), Java, or Kotlin (for Android).
Hosting:
This component involves the servers where the app’s back end operates. Hosting solutions can include services like Linux, Apache and cloud-based platforms such as Amazon Web Services (AWS).
Differences between Mobile and Web App Tech Stacks
While there are similarities in the tech stacks used for mobile and web applications, significant differences must be considered:
Mobile App Tech Stack
Web App Tech Stack
Designed for specific platforms (iOS or Android)
Run in web browsers, adaptable to various platforms
Native languages like Objective-C or Swift for iOS, Java or Kotlin for Android
Often developed with languages like Python, Ruby, and JavaScript
Tailored to the platform (e.g., SwiftUI for iOS, Android SDK for Android)
More universal frameworks like Rails, Django, or ASP.NET
Optimized for specific device screens and input methods
Designed to be responsive across multiple device types and screen sizes
Distributed via app stores, impacting updates and monetization
Accessible directly through a web browser
Platform Specificity:
Mobile apps are designed for specific platforms (iOS or Android), requiring platform-specific tools and frameworks. In contrast, web apps run in web browsers and are more adaptable to various platforms.
Programming Languages:
Mobile apps generally use native languages like Objective-C or Swift for iOS and Java or Kotlin for Android. Web apps, however, are often developed with languages like Python, Ruby, and JavaScript.
Frameworks:
Mobile app development frameworks are tailored to the platform, such as SwiftUI for iOS or Android SDK for Android apps. Web apps leverage more universal frameworks like Rails, Django, or ASP.NET.
User Interface:
Mobile apps need to be optimized for specific device screens and input methods, whereas web apps are designed to be responsive across multiple device types and screen sizes.
Distribution:
Mobile apps are typically distributed via app stores, impacting how they are updated and monetized. Web apps, on the other hand, are accessible directly through a web browser.
Choosing Your Tech Stack
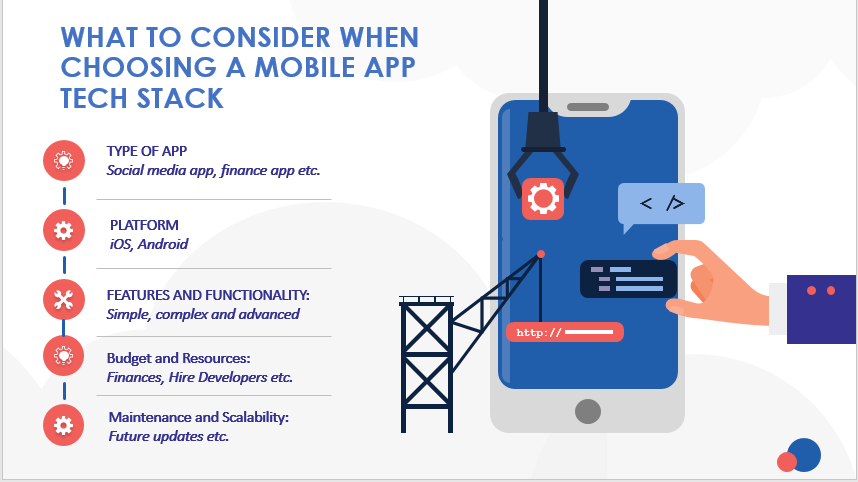
Navigating the complex world of mobile app development requires a solid understanding of the tech stack. The mobile app tech stack is a combination of programming languages, tools, and frameworks that bring your app to life. Here’s how to select the right one for your project. Following are the facts to consider when selecting a mobile app stack:
Type of App:
Are you creating a simple utility app or a feature-rich social media platform? The complexity of your app dictates the robustness of the tech stack needed.
Platform:
Are you targeting iOS, Android, or both? This choice significantly influences your tech stack, as some technologies are platform-specific.
Features and Functionality:
The functionalities you wish to include, like push notifications or AR/ VR Development reality, will have specific tech stack requirements.
Budget and Resources:
Your financial resources and the expertise of your development team are crucial in choosing a tech stack. Some stacks require more investment and skilled developers.
Maintenance and Scalability:
Consider how easy it is to maintain and scale the app with the chosen tech stack. Your app should be able to grow and evolve over time.
Development Options
There are three development options you can choose from, and each its own benefits:
Criteria
Native App Development
Hybrid App Development
Cross-platform App Development
Performance
High
Moderate
Balanced (Efficiency vs. Native Performance)
Development Time
Longer
Shorter
Moderate
Cost
Higher (Separate codebases)
Lower (Single codebase)
Moderate (Balanced cost due to shared codebase)
Access to Device Features
Full access
Limited access, depends on plugins
Varied (depends on framework capabilities and plugins)
User Experience
Native look and feel
May lack the native feel, especially for UI interactions
Closer to native, but some variations may exist
Maintenance Effort
Separate codebases for iOS and Android
Easier maintenance with a single codebase
Single codebase for both platforms, but may face challenges
Time to Market
Longer development time
Shorter development time
Moderate development time, faster than native
Platform-Specific Design
Adheres closely to platform guidelines
May require extra effort to match platform design
Close to native, but may still have platform-specific nuances
For iOS: Swift and Objective-C with the primary integrated development environment (IDE) being Xcode.
For Android: Java and Kotlin with Android Studio as the preferred IDE.
Advantages of Native App:
High Performance: Native apps are optimized for the specific platform, providing better performance.
Full Access to Device Features: Developers have direct access to device functionalities, resulting in richer user experiences.
Superior User Experience: Native apps offer a seamless and intuitive user interface consistent with the platform’s design principles.
Disadvantages of Native App:
Time-Consuming and Expensive: Developing separate codebases for iOS and Android can be more time-intensive and costly.
Platform-Specific Code: Maintenance requires updates for each platform separately.
When to Choose Native App Development:
High Performance is Critical: If your application requires maximum performance and responsiveness, especially for graphics-intensive or resource-demanding tasks, native development is the way to go.
Access to Device Features: When your app heavily relies on accessing specific device features (like camera, GPS, sensors) and you want full control over them, native development provides the best integration.
Platform-Specific Design Guidelines: If adhering closely to the platform’s design principles (e.g., Material Design for Android or Human Interface Guidelines for iOS) is crucial for a seamless user experience, native development ensures a native look and feel.
Native App Cost:
Below is native app cost:
App type
App Cost (1 platform, native)
Time
Basic native app cost
$50,000 to $70,000
7-9 weeks
Medium-complexity native app cost
$70,000 to $100,000
2-3 months
Complex native app cost
from $100,000
4+ months
Hybrid App Development Mobile App Tech Stack:
Languages and Tools Hybrid App Development:
Web Tech Stack: Utilizes web technologies such as HTML, CSS, and JavaScript.
Frameworks: Cordova, PhoneGap, or Ionic for creating cross-platform applications.
Advantages of Hybrid App:
Faster and Cheaper Development: One codebase can be used for both iOS and Android, reducing development time and costs.
Unified Codebase: Easier maintenance and updates as changes can be applied universally.
Disadvantages of Hybrid App:
Lower Performance: Hybrid apps may not perform as well as native apps due to the abstraction layer between the code and the device’s native features.
PotentiallyLessIntuitiveUserExperience: UI may not seamlessly integrate with the platform’s design guidelines.
When to Choose Hybrid App:
Limited Budget: If you have budget constraints and need to develop for both iOS and Android platforms, a hybrid approach allows you to share a single codebase, reducing costs.
Faster Time to Market: When speed is a priority and getting your app to market quickly is crucial, hybrid development often has shorter development cycles compared to native development.
Less Emphasis on Native Features: If your app doesn’t heavily rely on device-specific features or performance-critical tasks, and a consistent user experience across platforms is acceptable, a hybrid approach is a pragmatic choice.
Hybrid app cost:
The cost of developing a hybrid mobile application depends on several factors. We understand that cost is a significant factor when it comes to making a decision. If you consult with an Android or iOS development company, the cost of building each app can range between $50,000 to $100,000 and more.
However, building separate apps for each platform can end up costing you more than $200,000 to $250,000. That’s where hybrid app development can help you save a lot of money while still delivering a great app.
Cross-platform App Development Mobile App Tech Stack:
Cross Platform Frameworks:
Frameworks: React Native, Flutter, or Xamarin allow developers to use a single codebase for both iOS and Android.
Advantages of Cross Platform:
Balance Between Performance and Development Efficiency: Cross-platform frameworks aim to provide a good balance, offering efficient development while maintaining reasonable performance.
Broader Audience Reach: Target both major platforms with a shared codebase, expanding the app’s potential user base.
Cons of Cross Platform:
Platform-Specific Limitations: Some advanced features or optimizations may be platform-specific and not fully supported by cross-platform frameworks.
PerformanceIssues: While improved compared to hybrid apps, cross-platform apps may still face performance challenges, especially for resource-intensive tasks.
When to Choose Cross-platform App Development:
Balanced Performance and Efficiency: If you seek a balance between performance and development efficiency, cross-platform frameworks like React Native, Flutter, or Xamarin offer a compromise that allows you to write code once and deploy it on both platforms.
Broader Audience Reach: When reaching a wider audience with a single codebase is a priority, cross-platform development allows you to target both major platforms, minimizing the need for separate development efforts.
Shared Codebase Maintenance: If maintaining a single codebase for both platforms is crucial for ease of maintenance and updates, cross-platform development simplifies the development lifecycle.
Cross-platform app cost
The cost of a cross-platform app can vary depending on factors like how complex the app’s features are, where the developers are located, and how many screens are involved. Youcan expect to pay somewhere between $10,000 and $50,000. And remember the ongoing costs of maintaining and scaling the app!
Examples from Industry Leaders
Understanding the mobile app tech stackmore explicits clearer when examining how industry giants like Facebook, Airbnb, Uber, Instagram, and Twitter have approached their development. Each of these companies has tailored their technology stack to meet their specific needs, providing valuable insights for anyone considering their tech stack for a mobile app.
Facebook’s Tech Stack
Facebook employs a robust tech stack, featuring PHP, React, and Cassandra. Its infrastructure leverages HHVM for efficient code execution, ensuring a seamless user experience at scale.
Native Development Approach: Facebook uses a native tech stack for its iOS and Android apps.
Languages and Tools: The apps are developed using Objective-C, Swift (iOS), Java, and Kotlin (Android).
Frameworks and Libraries: UIKit (iOS) and Android SDK (Android) are central, supplemented by React Native and GraphQL for specific functionalities.
Insight: Facebook’s choice of a native approach underscores the importance of performance and user experience in social media apps.
Airbnb’s Hybrid Approach
Airbnb utilizes a hybrid approach, combining native and web technologies. React Native powers an app like airbnb for its mobile app tech stack, enabling cross-platform development while maintaining a native user experience.
Combining Native and Web Technologies: Airbnb uses a hybrid tech stack for its mobile apps.
Core Technologies: The codebase is primarily in JavaScript, compiled into native code using React Native.
Platform-Specific Integration: They use native development frameworks like UIKit and Android SDK for particular features.
Insight: Airbnb’s hybrid approach demonstrates how to blend web and native elements for a seamless user experience across platforms.
Uber’s Optimised Tech Stack
An app like Uber uses a mobile app tech stack that is optimized for performance and scalability. It relies on Node.js for backend, React for frontend, and a microservices architecture, ensuring efficient and reliable services globally.
Focused on Native Development: Uber, like Facebook, opts for a native tech stack.
Diverse Language Use: The apps are built using Objective-C, Swift, Java, and Kotlin.
Libraries and Frameworks: They leverage RxJava and Retrofit, along with UIKit and Android SDK.
Insight: Uber’s tech stack highlights the need for real-time performance and reliability in a transportation app.
Instagram’s Focus on Native Technologies
An app like Instagram prioritizes native development with Swift and Kotlin for iOS and Android, respectively. This mobile app tech stack focuses on enhancing performance, provides full access to device features, and ensures a seamless user interface.
Native Development for Performance: Instagram uses a native tech stack for its mobile apps.
Languages and Frameworks: The apps are developed in Objective-C, Swift, Java, and Kotlin, using UIKit and Android SDK.
Third-Party Tools: Additional tools like AFNetworking and Facebook SDK are used for specific functionalities.
Insight: Instagram’s tech stack choice emphasises the importance of high performance and smooth user experience in image and video-intensive applications.
Twitter’s Scalable Tech Stack
Even before the bird fled, X formerly known as Twitter has a exceptional mobile app tech stack. Twitter’s scalable mobile app tech stack includes Java, Scala, and Ruby. Its microservices architecture ensures flexibility and scalability, allowing Twitter to handle vast amounts of data and user interactions efficiently.
Native Approach for Scalability: Twitter also employs a native tech stack for its iOS and Android apps.
Development Tools: The apps are built using Objective-C, Swift, Java, and Kotlin.
Frameworks and Libraries: Twitter integrates UIKit and Android SDK, as well as Fabric and Crashlytics for analytics and performance monitoring.
Insight: Twitter’s tech stack reflects the need for handling large volumes of real-time data and interactions.
Making the Right Decision
To make the right decisions about your mobile app tech stack, start by setting clear goals. Define the core purpose and target audience, guiding your technology choices based on these factors. Consider feature-specific needs to align functionalities with the appropriate tech stack.
Evaluating Crucial Factors:
Consider cost implications when choosing a mobile app tech stack. Explore how different stacks may impact your budget, both during initial development and long-term maintenance. Assess the development timeline, understanding the relationship between tech stacks and the speed at which your app can be brought to market. Ensure the chosen stack optimizes app performance for a smooth user experience and discuss the importance of scalability for future growth.
Tech Stack Selection in Practice:
For simple apps, consider the MEAN stack, while more complex applications benefit from combinations like Java/Kotlin or Swift/Xcode. Explore industry examples to see how successful apps align their mobile app tech stack with specific goals.
Facebook’s native stack prioritizes performance, while Airbnb’s hybrid approach combines native and web technologies for cross-platform development with a native feel. Understanding these choices can guide your decision-making process for a tech stack that suits your app’s unique needs and goals.
Conclusion
As we wrap up our exploration of the mobile app tech stack, it’s vital to reiterate the importance of this decision in your app development process. Your choice of technology stack – the combination of programming languages, frameworks, tools, and platforms – serves as the backbone of your mobile app, influencing everything from cost and speed to performance and user experience.
We all love to plan trips right? Especially when we are going somewhere we’ve dreamt of. Planning ahead is the way to go for hassle free trips. Some of us like booking hotels, flights and find cars on the best car rental app ahead of reservations. When you need to book a car at the last minute, the best car rental apps can be very helpful.
Car Rental App Stats 2023
Before listing the best car rental app for you, lets delve into some Car Rental App Stats 2023:
According to projections, the revenue of the Car Rentals industry is expected to reach US$99.27 billion by 2023.
There are over 2 million economy-class cars in the US car rental industry.
Car rental market valued at $119B in 2021, expected to grow to $223B by 2027 (CAGR of over 11% from 2022 to 2027).
Why Car Rental Apps?
Renting a car is a convenient way to avoid the high costs of owning and maintaining a vehicle. Instead of spending hundreds of dollars on upkeep and repairs, you can simply rent a car when you need it. While your insurance may cover some of the costs, you will still be required to pay a significant amount before your vehicle can be repaired.
It also helps you cross the hassle of owning a car and allows you to avoid the associated expenses. With the help of an Android app for car rental services, you can easily hire a cost-effective car that meets your requirements. To find the best car rental app that is right for you, here is a list of options to consider.
Is it better to book a car rental in advance?
Booking a car rental in advance offers several advantages that can significantly enhance your travel experience. Firstly, it provides you with a wider selection of vehicles, ensuring that you can choose the type and size that best suits your needs.
This is particularly beneficial during peak travel seasons when demand for rental cars is high. Additionally, booking in advance often comes with cost savings, as many rental companies offer discounts for reservations made ahead of time. You can take advantage of promotions, compare prices across different providers, and secure the most competitive rates.
Moreover, advance booking allows you to plan your itinerary more efficiently, knowing that your transportation needs are already taken care of. In summary, while last-minute rentals might be possible, booking in advance provides convenience, cost savings, and peace of mind for a smoother travel experience.
Fix Car Sharer – The Ultimate Car Rental App
Fix Car Sharer stands out as the best car rental app, offering a user-centric carpooling experience in Germany. Built on cutting-edge technologies like React, React Native, Node Js & Azure, the app prioritizes sustainability, convenience, and reduced traffic congestion. Key features include carpool scheduling, QR code start, preference matching, real-time tracking, payment integration, and route optimization.
Developed by TechnBrains, a top-notch React Native App Development Company, the app excels in client-centric solutions, expertise in React Native, innovative development, quality assurance, timely delivery, and post-launch support. Despite challenges, Fix Car Sharer has achieved substantial user adoption, diverse driver recruitment, trust-building, and positive reviews, making it a game-changer in the transportation industry.
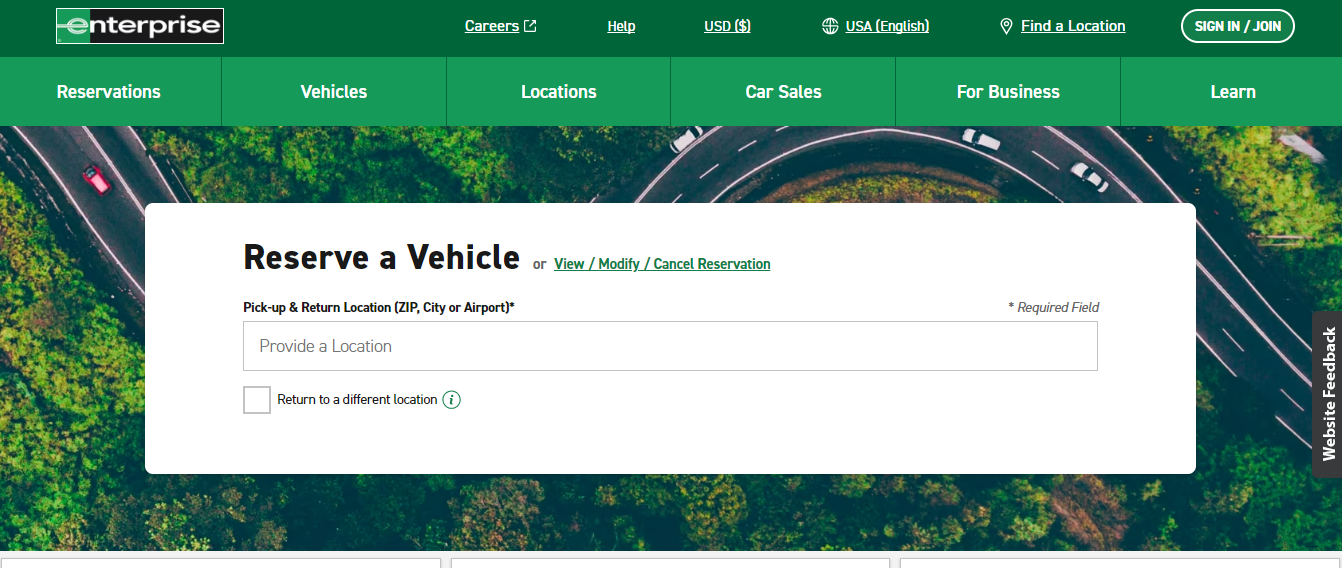
Enterprise Car Rental
Enterprise Car Rental is a standout choice in the world of rental vehicles, consistently ranking as one of the best car rental apps. Renowned for its hassle-free bookings, Enterprise has solidified its reputation over the years. The Enterprise app mirrors this excellence, offering a seamless reservation experience comparable to in-person transactions.
Navigate your surroundings effortlessly by using the app’s map feature, pinpointing the most convenient Enterprise store for you. What sets this apart is the app’s top-tier functionality, allowing you to refine your search results through filters, making it one of the finest car booking apps available anywhere. Choose Enterprise for a superior car rental app experience.
Hertz Car Rental
Introducing Hertz Car Rental, a powerhouse in the vehicle rental industry and a top contender for the title of the best car rental app. With a strong presence across the United States and beyond, Hertz ensures convenience for your rental needs, making it an ideal choice for iPhone users. Through the user-friendly app, aptly designed for seamless experiences, you can effortlessly initiate new rentals or manage existing ones.
Need to tweak your pick-up time or alter the drop-off location? Hertz has you covered. What sets it apart? The app caters to Hertz Gold Plus Rewards members, offering streamlined point management and exclusive car-sharing insights with just a tap or a glance.
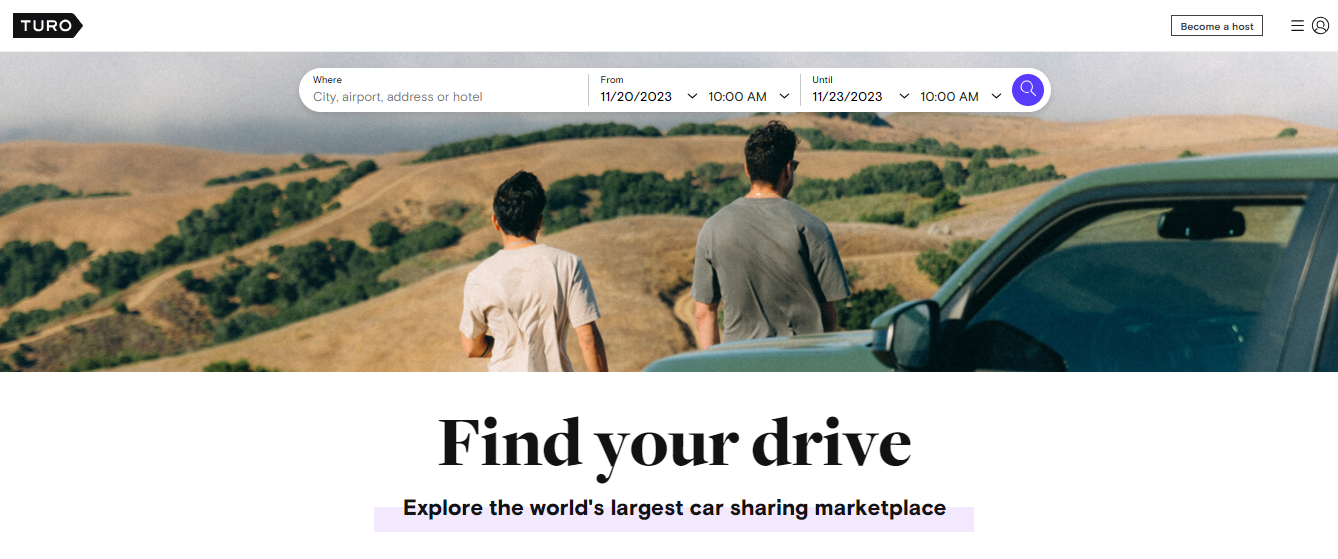
Turo – Car Rental App
Experience a game-changer in the car rental world with Turo – the best car rental app that goes beyond traditional rentals. Turo stands out as a dynamic car-sharing platform, gaining worldwide popularity. Whether you’re seeking a short-term ride for your daily commute or planning a long road trip, Turo boasts an extensive fleet to cater to your needs.
With a thriving community of over 10 million members generously sharing their vehicles, finding the perfect car is a breeze in the United States, Canada, or the United Kingdom through Turo’s innovative app. Plus, turn the tables and earn by renting out your own vehicle to fellow users in need. Turo redefines the car rental experience, making it more than just a transaction – it’s a community-driven adventure.
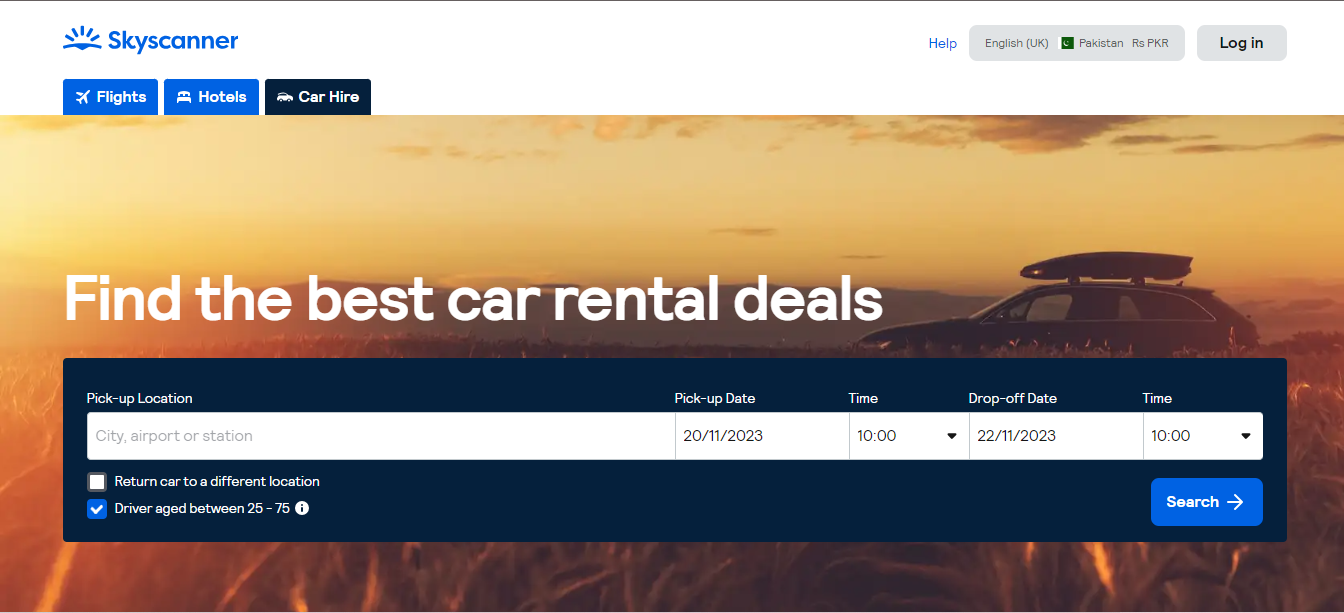
Skyscanner app
Discover the Skyscanner app – your go-to for the best car rental deals! Uncover the heart of your travel plans with this fantastic tool that goes beyond just flights. Skyscanner breaks down every car rental option, providing insights into fuel policies, insurance details, and more, ensuring you get the perfect vehicle for your adventure.
But that’s not all – Skyscanner isn’t just about cars; it’s your all-in-one travel companion. Book your rental, hotel, and flight seamlessly, all from one spot. The app’s transparency shines through its selection of hotel rooms and travel choices, offering you a clear view of your options. Plus, dive into user reviews for rental vehicles, gaining valuable insights into how specific rental businesses have delighted customers in the past. Elevate your travel experience with Skyscanner, the best car rental app in town!
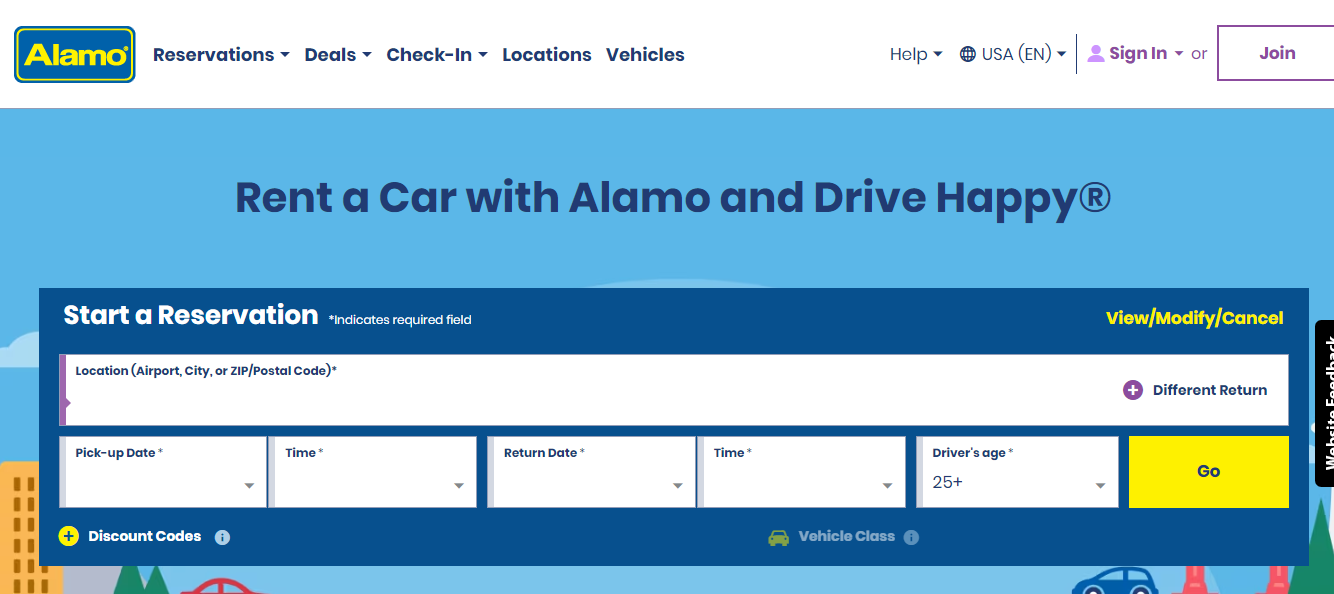
Alamo
Discover Alamo – a standout car rental app, undoubtedly among the best available. Easily find the perfect vehicle, be it a compact car or a spacious family SUV, with the app’s user-friendly navigation. This Android car rental gem not only presents mileage details and passenger capacity but also estimates the luggage it can comfortably handle.
Efficiency is the game-changer here – input your driver’s license number, date of birth, and essential details in advance through the app. Arrive, hop into your chosen vehicle, and drive off hassle-free. Alamo ensures a seamless and time-saving rental experience, solidifying its position as the best car rental app around.
SIXT
Discover the ultimate solution for your transportation needs with SIXT: your go-to app for seamless car rentals, convenient car sharing, and hassle-free taxi trips. This app is not just a download; it’s a game-changer. Whether you’re in need of a stylish limo or a reliable ride-share, SIXT has you covered in over 100 countries.
The brilliance lies in its simplicity – effortlessly filter your preferences, from vehicle type to seat capacity. With SIXT, you’re not just getting an app; you’re gaining access to a world of easy, efficient, and tailored transportation options. Download now and redefine your travel experience.
Tips to book Your Best car Rental App
When booking rental cars through an app, consider these tips for a seamless and cost-effective experience:
Define Your Needs:
Clearly define your rental needs, considering factors like the duration of the rental, the type of vehicle, and any specific features you require. This will help you narrow down your options on the app.
Compare Prices:
Don’t settle for the first offer. Use the app to compare prices across different rental agencies. Prices can vary, and you might find a better deal by exploring multiple options.
Check Reviews:
Look for user reviews within the app to gauge the satisfaction of previous customers with the rental agency and specific vehicle models. This can provide valuable insights into the overall experience.
Want to build the best car rental app? Call Us now to get started!
Verify Insurance Coverage:
Understand the insurance coverage provided by both the rental agency and your credit card. Some credit cards offer rental car damage protection, so check your card’s benefits to avoid redundant insurance fees.
Consider Membership Programs:
Explore loyalty or membership programs offered by the rental agency or through your credit card. These programs may provide perks such as discounts, upgrades, or elite status.
Inspect the Vehicle:
Upon pickup, thoroughly inspect the rental car for any existing damage. Use the app to document and report any issues to the rental agency to avoid being held responsible for pre-existing damage.
Flexible Booking:
Opt for apps that allow flexibility in booking. Life can be unpredictable, so having the option to modify or cancel reservations without hefty fees can be beneficial.
Fuel Policies:
Be aware of the fuel policies of the rental agency. Some may require you to return the car with a full tank, while others might have different fueling options. Choose the option that aligns with your preferences.
Check for Discounts:
Look for discounts or promo codes within the app. Some rental agencies offer exclusive promotions or partnerships that can save you money on your rental.
Plan Ahead:
Booking in advance often comes with better rates. Plan your trip and book your rental car ahead of time to secure the best prices and vehicle availability.
Additional Tips for booking rental cars with an app
To select the best car rental app, it is crucial to determine the type of rental you need. This can depend on various factors such as the rental duration and the credit card you possess. Therefore, it is important to precisely identify exactly what kind of rental you are looking for.
Looking to rent a car for your next adventure? Before you book one, make sure to check your credit card for any rental car benefits. You might be surprised to know that some travel rewards credit cards offer rental car damage protection. However, keep in mind that this coverage typically applies only to traditional car rentals and not hourly or peer-to-peer rentals.
Wrapping it Up
When it comes to the best car rental app, the best one for you will depend on what you need. If you’re looking for a traditional car rental company, we recommend using the Fix Car Sharer app. Our testing found that it searched the most rental car providers and returned the cheapest prices.
Innovative Solutions by TechnBrains
At TechnBrains, our commitment to excellence begins with a client-centric approach. We prioritize understanding the unique challenges and goals of each client, ensuring that our car rental app solutions are tailor-made to exceed expectations.
Our commitment doesn’t end with the launch of the app. TechnBrains provides continuous post-launch support, ensuring that our clients’ car rental apps remain up-to-date, secure, and optimized for ongoing success in the dynamic app industry.
Looking for the best Shopify apps to help your online store stand out in the competitive world of ecommerce?
Shopify is the leading platform for entrepreneurs and businesses to build online stores with its user-friendly interface and powerful features. However, to truly excel, it’s essential to use the right tools, and that’s where Shopify web development come into play.
There are both paid and free Shopify apps available to help you grow your email lists, generate leads, and increase revenue. In this article, We will share with you the best Shopify apps, including the best free Shopify apps that can boost your ecommerce store’s performance.
In this blog we will cover:
Shopify App for Multi-Vendor Marketplaces
Shopify Apps for Conversions
Shopify App for Social Media Selling
Shopify App for Social Proof
Shopify App to Upsell and Cross-Sell
Shopify App for Gift Giving
Shopify Payment Option App
Shopify App for Email Marketing & SMS
Shopify App for Dropshipping
Best Shopify App for Multi-Vendor Marketplaces
A Shopify app for multi-vendor marketplaces is a solution that allows multiple vendors to sell their products within a single Shopify store. These apps enable vendors to manage their own shops, products, and sales while providing customers with a seamless shopping experience.
In My Happy Place
Your Shopify-Powered Multi-Vendor Solution!
MultiVendor
This app is an excellent choice for creating a multi-vendor marketplace on Shopify. It allows multiple vendors to easily manage their online shops, and it offers various membership plans and commission management features, aligning with the objectives of “In My Happy Place.”
WC Marketplace
WC Marketplace is another robust solution for creating multi-vendor marketplaces on Shopify. It provides essential features for multi-vendor operations, membership plans, and commission tracking, making it a suitable option for “In My Happy Place.”
This web app can help you efficiently set up and manage your multi-vendor marketplace, aligning with the goals of In My Happy Place.
Key Features
Multi-Vendor Support
Membership Plans
Shop Management
Stripe Integration
E-commerce Tools
Search and Filters
Best Used For
Creating a multi-vendor e-commerce platform on Shopify, allowing shop owners to manage their online shops, offer membership plans, and efficiently track commissions
Best Shopify Apps for Conversions
Shopify is the go-to platform for building online stores. To excel in the competitive world of e-commerce, it’s essential to use the right tools. Shopify apps can help you enhance your store’s functionality and improve business operations. With both paid and free options available, choose the ones that suit your needs.
OptinMonster
OptinMonster tops the list of the best Shopify apps for increasing overall conversions. It is an all-in-one app that is perfect for growing your email list, increasing sales, and recovering potential customers. OptinMonster is an efficient app that combines the functionality of multiple apps, making it the best option for Shopify store owners.
With OptinMonster’s ecommerce features, you can create amazing marketing campaigns for lead generation, product recommendation, abandoned cart recovery, and incentives like discount wheels.
Key Features
Drag and drop campaign builder
Wide range of design blocks to add videos, countdown timers, images, and more
Usable across multiple platforms including Shopify, WooCommerce, Big Commerce, and others
Live customer support and extensive documentation
Best Used For: This tool is best used for recommending products, retaining customers on site, and increasing conversion rates.
Pricing: Pricing for the tool starts at $9/month for up to 2,500 campaign impressions.
PushEngage
PushEngage is a Shopify app that allows you to send customized push notifications to your website visitors. This feature helps you recover abandoned carts, re-engage with users while they are on your website, and increase your sales.
Since there is no need to share personal information such as email or phone number, people are more likely to sign up for push notifications.The best part is that you can easily install PushEngage with just one click.
Key features
Customizable opt-in display rules
Flexible push notification design options
Automated abandoned cart messages
Audience segmentation
Easy setup without requiring any coding
Best Used For: PushEngage is best used for attracting traffic, re-engaging visitors on site, and recovering abandoned carts.
Pricing: PushEngage offers a free plan that can accommodate up to 200 subscribers and 30 campaigns to help you commence. The pricing plans begin at $9 per month and can cater up to 100K subscribers.
Available on: PushEngage is available on Shopify App Store, WooCommerce, BigCommerce, and all other ecommerce platforms.
Best Shopify App for Social Media Selling
Looking to expand your ecommerce business beyond Shopify? You’re not alone. While Shopify is a fantastic platform to build your store, there are other sales channels that offer wider reach. Luckily, there are plenty of apps available to make it easy for you to sell on other platforms. Check out our list of the best apps for selling on other channels and take your business to the next level.
The Pinterest app is a free Shopify feature that allows you to display shoppable product Pins on your Pinterest account. Pinterest is a widely used content sharing platform, particularly for fashion, household products, and other lifestyle items.
By using the Pinterest Shopify app, potential customers browsing on Pinterest can search, save, and purchase items from your online store. This can be seen as free advertising for your store.
Key features: Key features of this app include automatic catalog updates, a Pinterest tag for performance tracking, a Shop tag on Pinterest profile, and targeting by demographics and interests.
Best used for: Building brand awareness and generating traffic.
Pricing: Free to install with additional fees for Pinterest ads.
Available on: Shopify App Store.
Best Shopify App for Social Proof
Social proof is where shoppers seek validation from the experiences of other customers before making a purchase decision. By displaying social proof elements like reviews, testimonials, and purchase notifications, you assure potential customers that others have bought and are satisfied with your product.
This way you are communicating a message that if they purchase your product, they too can experience the same level of satisfaction. Below are the best Shopify apps that can help you effectively collect and display social proof on your website.
Judge.me
Judge.me is a trending Shopify app that automatically collects and displays customer reviews, helping to increase sales by showcasing real feedback from satisfied customers.
The app sends review requests to customers via email, making it easy for them to leave feedback directly inside the email. You can then choose which reviews to display on your website, Google Search, Google Shopping, and Facebook.
Key Features:
The ability to display text, photos, and video reviews
SEO-optimized rich snippets
Social sharing of reviews.
Best Used For: Use for social proof, customer feedback, SEO, and reviews.
Pricing: Free plan available, $15/month for advanced features.
Available on: Shopify App Store.
Best Shopify App to Upsell and Cross-Sell
After successfully convincing a customer to make a purchase, it is important to keep the momentum going. One way to do this is by encouraging the customer to increase the size of their order. Fortunately, there are several apps available that can help with this. Check them out and see how you can increase your sales.
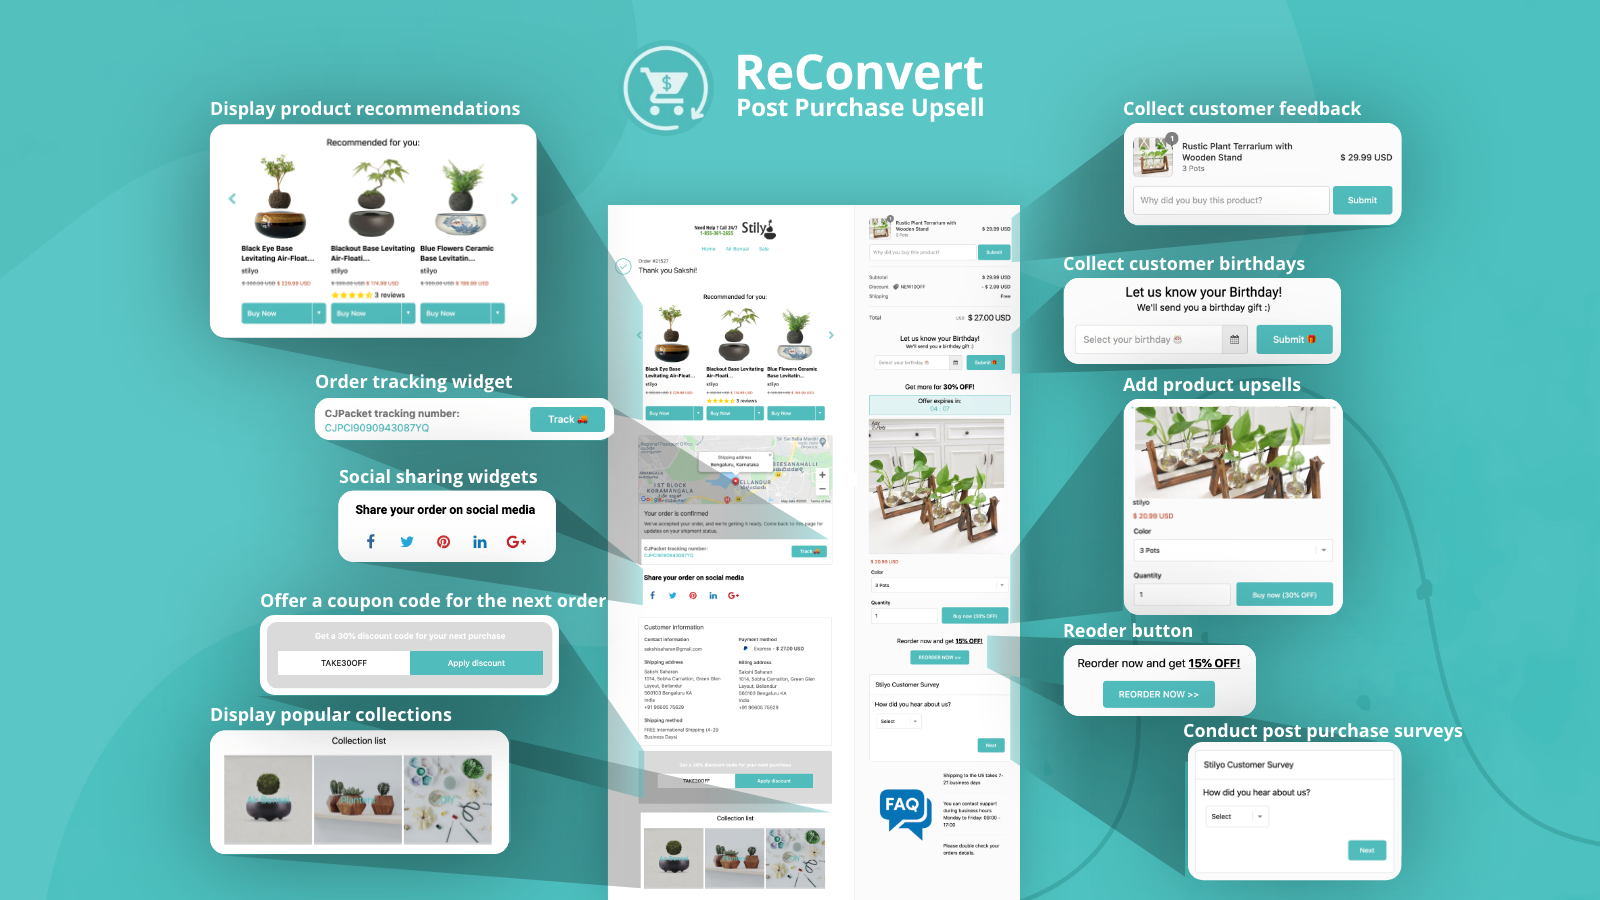
ReConvert Upsell & Cross-Sell
With ReConvert, you can easily create one-click upsell offers that appear on your checkout and thank-you pages. This makes it easy for your customers to add upsell items to their cart with just one click and proceed straight to checkout.
You can also optimize your thank-you page with a range of features such as cross-sells, pop-up discounts, product recommendations, urgency timers, and customer surveys. This allows you to maximize your sales and improve your customer experience.
ReConvert integrates seamlessly with the Shopify admin panel, which means you can create your upsells directly in Shopify.
With advanced segmentation and an intuitive editor for your offers and thank-you pages, creating and managing your upsells has never been easier. Plus, ReConvert also offers AI-powered product recommendations and discount distributors to help you make the most of your upsell opportunities.
Best used for: Increasing average order value, recommending products, collecting feedback.
Pricing: Free plan available with 49 store orders per month. Paid plans start at $7.99/month.
Available on: Shopify App Store.
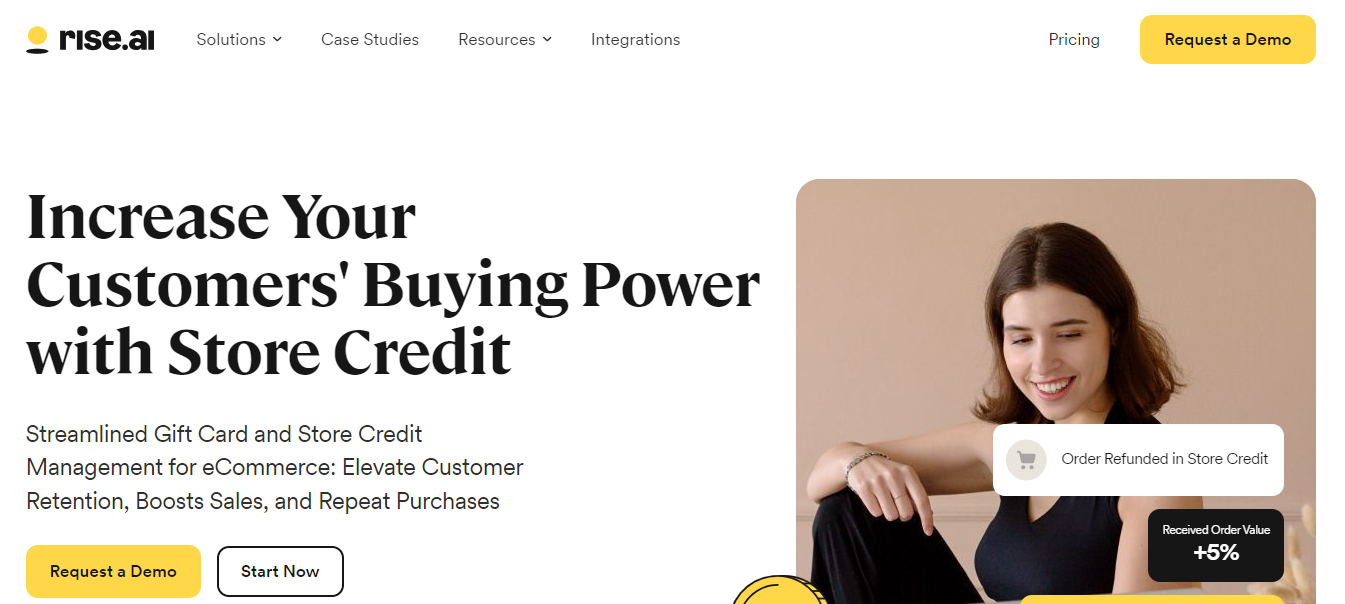
Best Shopify App for Gift Giving
One way to boost sales is to tap into the gifting market. Customers who may not be interested in your products themselves may know someone who would love them. Here are our top picks for gifting apps on Shopify.
Customers can send branded digital gift cards via email and earn store credit or other rewards for purchasing gift cards. This not only helps you make a sale that you may otherwise have missed out on, but it also introduces your brand to a new customer.
Moreover, you can use Rise.Ai Gift Cards & Loyalty Programs to run loyalty, rewards, and referral programs.
Key Features:
Advanced gift card experience
Fully customized loyalty program
Intuitive store credit solutions
Best Used For:
Increasing sales
Building brand awareness
Improving customer retention
Pricing: Our pricing starts at $19.99 per month with a 7-day free trial.
Available on: Shopify App Store.
Best Shopify Payment Option App
Don’t miss out on potential sales! By offering alternative payment and ordering options, you can give your customers the flexibility they need to make a purchase. Don’t let your competitors take the lead – try implementing these options today and see the difference it can make.
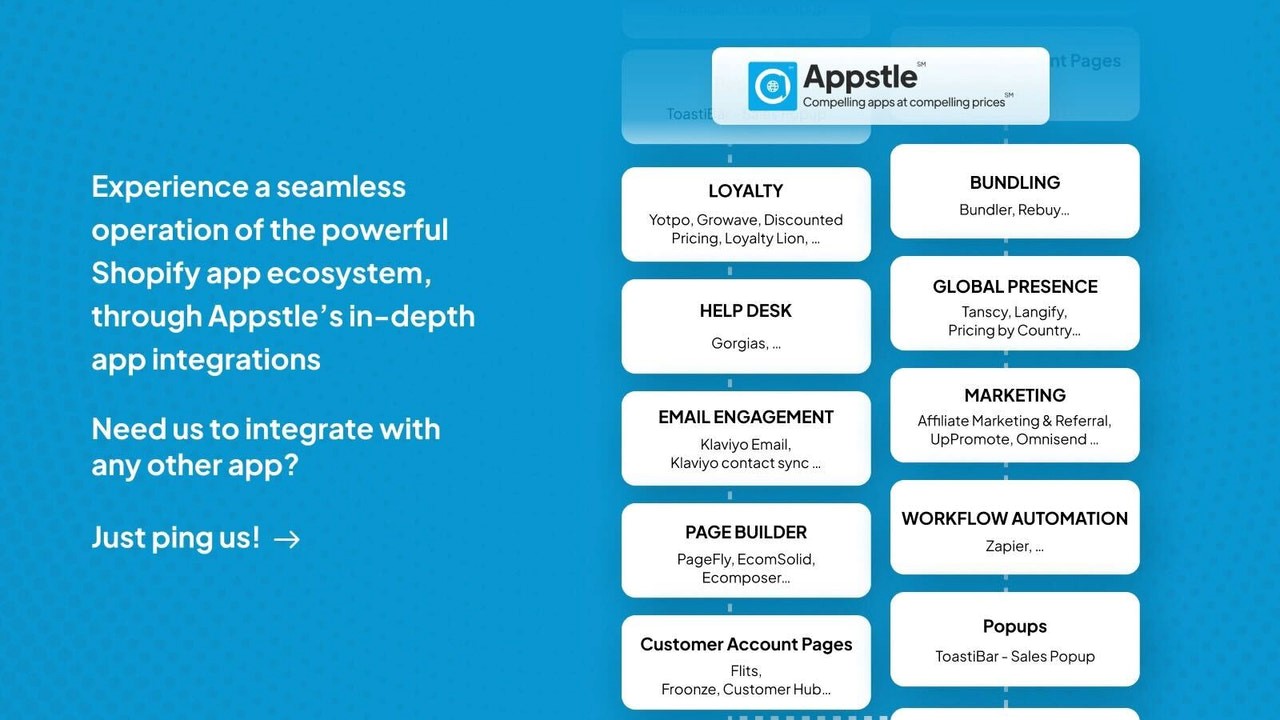
Appstle Subscriptions & Loyalty
Appstle Subscriptions is a Shopify app that allows you to sell products and services to your customers on a recurring basis. By leveraging the power of recurring orders, you can increase your revenue and attract more loyal customers. With Appstle, offering subscriptions to your customers is a breeze.
You can easily manage your Appstle subscription orders from your Shopify admin panel, streamlining your workflow and saving you time.
Key Features:
A unified shopping cart for one-time and subscription purchases
Tiered discounts on subscriptions to incentivize customers
A self-managed customer portal that empowers customers to manage their own subscriptions.
Best Used For: Increasing customer lifetime value and building loyalty.
Pricing: Free plan available for up to $500 in monthly subscription sales, with paid plans starting at $10/month.
Available on: Shopify App Store.
Best Shopify App for Email Marketing & SMS
Acquiring a sale is just the beginning of a customer relationship. With a well-planned strategy and effective tools, it is possible to transform a new buyer into a devoted regular customer and a loyal advocate of your brand. Here are some of our top marketing tools that you can use to nurture customer relationships post-sale.
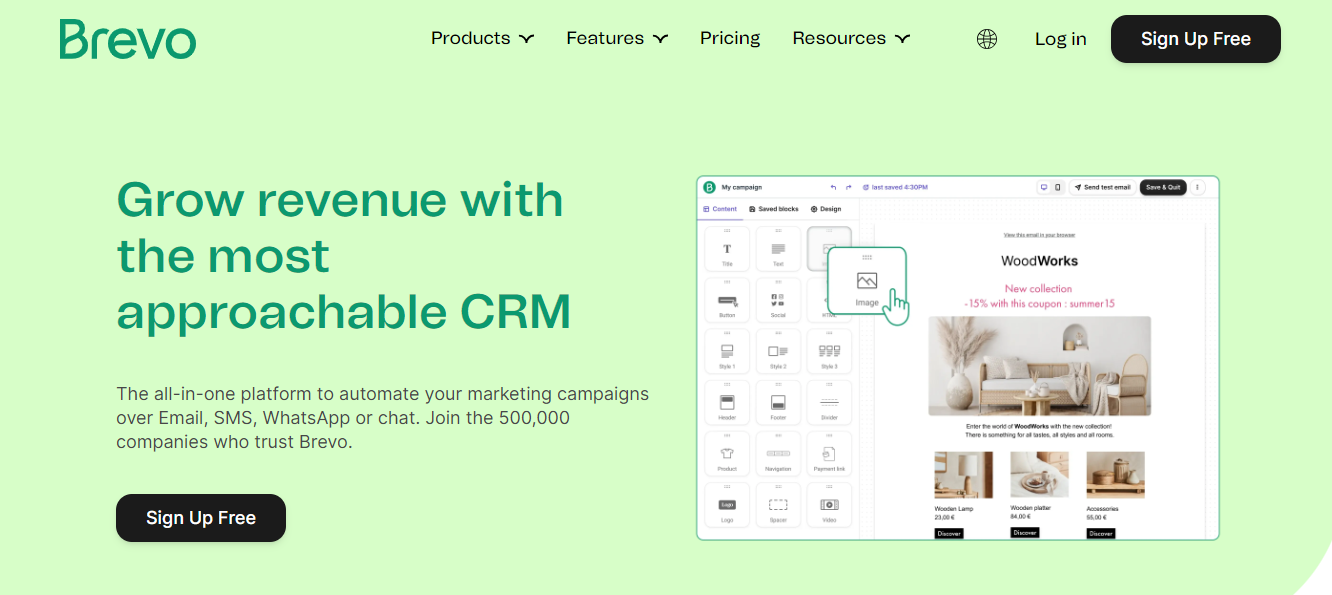
Brevo
Brevo, formerly known as Sendinblue, is a marketing platform that allows you to reach your Shopify customers via email and SMS. You can use it to share onboarding material, new products, and other marketing content with your customers.
Brevo makes it easy for you to create visually appealing and effective emails and send them to your Shopify customer lists. You can also manage your text messaging directly from your Shopify back office.
Some of the key features of Brevo include automatic sync with Shopify contact and purchase data, the best deliverability rates for Shopify marketing and transactional emails, and a powerful and user-friendly email builder.
Best Used For: Use Brevo for customer service and relationship management.
Pricing: Free plan available.
Best Shopify App for Dropshipping
Shopify Apps for Dropshipping automate and optimize tasks like product sourcing, order fulfillment, and inventory management, allowing businesses to focus on growth and customer satisfaction.
DSers
DSers is a highly rated Shopify app that facilitates dropshipping. By using DSers, you can source products for your Shopify store without dealing with inventory or order fulfillment on your own.
Key Features:
Automatic order and package tracking
Bulk orders
Management of multiple Shopify stores
Best Used For:
Sourcing products
Managing inventory and order fulfillment
Dropshipping
DSers is an excellent tool for anyone looking to streamline their dropshipping business. The platform’s features are highly beneficial and contribute to a more efficient workflow.
Pricing: DSers offers a free plan that allows up to 3,000 products. Paid plans start at $19.90 per month, which includes more products and advanced product mapping.
TechnBrains Can make the best Shopify Apps for You
TechnBrains, the Shopify web development company behind “In My Happy Place,” has played a pivotal role in shaping this multi-vendor marketplace app into a thriving and user-friendly platform. Our contributions and expertise have been instrumental in making this app successful. Here are some key points highlighting how TechnBrains has excelled in developing this app:
Unparalleled Expertise: We bring a highly skilled team of Shopify developers with in-depth knowledge of the platform. Their expertise has been instrumental in crafting the app’s functionality and user experience.
Innovative Solutions: TechnBrains has consistently adopted the latest e-commerce trends and technologies to keep “In My Happy Place” competitive. This commitment to innovation has ensured that the app remains up-to-date and capable of meeting evolving market needs.
Client Satisfaction: The track record of TechnBrains is marked by delivering exceptional Shopify solutions and achieving client satisfaction. Their ability to understand the client’s vision and turn it into a reality is a testament to their commitment to excellence.
User-Centric Approach: TechnBrains prioritizes effective communication and support, ensuring a seamless and client-centered experience. This focus on understanding the needs of both shop owners and customers has resulted in a user-friendly interface and smooth navigation within the app.
TechnBrains‘ expertise, innovative approach, track record of excellence, and commitment to client satisfaction have all contributed to making “In My Happy Place” a successful and feature-rich Shopify multi-vendor marketplace app. Their dedication to quality and user-centric design has been key to its success.
Wrapping it Up
When it comes to the e-commerce world, finding the best Shopify apps can be a game-changer for your business. Whether you’re looking for best dropshipping apps to streamline your product sourcing or best subscription apps to boost recurring revenue, the free apps can offer valuable features. These apps cover a wide range of functionalities, from best Shopify apps to increase sales through marketing and conversion optimization to best Shopify shipping apps for seamless order fulfillment.
If you’re on a budget, don’t worry; there are plenty of best free apps for Shopify to explore. And if you ever need to make changes, learning how to cancel Shopify app subscription is just a click away. But if you’re feeling ambitious and want to create your own tools, you can dive into how to build a Shopify app or discover the must-have Shopify apps that can inspire your development journey. So, whether you’re a store owner looking for solutions or a developer seeking to learn how to make a Shopify app, the Shopify ecosystem has something for everyone.
FAQs
What are the best Shopify countdown apps for your store?
There are several Shopify countdown apps available in the Shopify App Store. Some popular options include Hurrify – Countdown Timer, Countdown Timer Bar, and Product Countdown & Sales Timer. These apps help create a sense of urgency to boost sales by displaying countdown timers for limited-time offers and promotions on your store.
What Shopify marketing apps do you use, and why?
The choice of Shopify marketing apps can vary depending on your specific needs, but some effective ones include Klaviyo for email marketing, Privy for exit-intent popups, and Oberlo for Shopify app Amazon product dropshipping. These apps help you engage with customers, capture leads, and streamline dropshipping from Amazon.
Which Shopify apps have been most effective in your store?
The effectiveness of Shopify apps can vary from store to store. However, apps like Oberlo, Yotpo for reviews, and Rewards and Referrals by Swell have been known to boost sales and customer engagement for many e-commerce businesses.
Are there any Shopify apps or tools that can help with SEO?
Yes, several Shopify apps are designed to improve your store’s SEO. Notable options include SEO Image Optimizer, Plug in SEO, and SEMrush SEO Writing Assistant, which assist in optimizing your product pages, meta tags, and content for better search engine rankings.
What are the most effective Shopify apps for conversions?
To improve conversions, consider using apps like OptinMonster for lead generation, FOMO for social proof, and Bold Upsell for upselling and cross-selling. These apps can help increase your conversion rates.
What are the best apps for Shopify product pages?
Enhancing your Shopify product pages can be achieved with apps like PageFly Page Builder, Product Reviews, and Swatchify for product variants. These apps help improve the visual appeal and functionality of your product pages.
What apps and integrations are available on Shopify?
Shopify offers a wide range of apps and integrations through the Shopify App Store. These include apps for marketing, sales, inventory management, shipping, and more. You can find tools like Shopify app Amazon product dropshipping solutions and various other apps to enhance different aspects of your e-commerce business.
What are the best Shopify Applications that have proven results?
Some of the Shopify applications with proven results include Shopify Payments for secure payment processing, Shopify Email for email marketing, and Shopify POS for in-store sales management.
What are the 10 top Shopify plugins?
Determining the “10 top Shopify plugins” can be subjective, but some popular choices include Oberlo, Klaviyo, OptinMonster, Oberlo, PageFly, FOMO, Bold Upsell, Product Reviews, Privy, and Rewards and Referrals by Swell.
What is the best affiliate app for Shopify?
An excellent affiliate app for Shopify is Refersion. It allows you to create and manage affiliate programs, track referrals, and reward affiliates for driving sales to your store.
If you are a software developer, you must have heard of the LAMP stack that comprises Linux, Apache, MySQL and PHP. These are open-source components that allow developers to build dynamic websites and web applications. However, in recent years, MERN stack has gained popularity as a development stack that is used to create scalable web and mobile applications.
In this comprehensive guide, we will delve into the world of the MERN stack, equipping you with the knowledge and skills needed to excel in web development. The MERN stack, which stands for MongoDB, Express.js, React, and Node.js, is a popular choice for building dynamic and efficient web applications. This guide aims to provide a thorough understanding of each component of the stack and guide you through the process of creating your own MERN-based projects.
What Is MERN Stack?
The MERN stack is a full-stack JavaScript solution that encompasses four key technologies:
MongoDB: A NoSQL database that stores data in a flexible, JSON-like format. It is known for its scalability and high-performance capabilities.
Express.js: A web application framework for Node.js that simplifies the development of web applications by providing a range of powerful features and tools.
React: A JavaScript library for building user interfaces. React allows you to create interactive and responsive UI components for your web applications.
Node.js: A server-side JavaScript runtime environment that enables the execution of JavaScript code on the server. It’s known for its speed and efficiency in handling network requests.
Express JS
For those wondering about “what is express js” we have the answer for you. Express js is a critical component of the MERN stack, which stands for MongoDB, Express.js, React, and Node.js. Each of these technologies serves a specific role within the stack, and Express.js is responsible for handling the back-end aspects of web applications in the MERN architecture.
Here’s how Express.js is related to the MERN stack:
Back-End Development: Express.js is the back-end framework within the MERN stack. It provides a robust and efficient platform for building the server-side of web applications. It handles tasks such as routing, middleware, database connections, and API development.
API Creation: In a MERN stack application, Express.js is commonly used to create APIs that allow the front-end, built with React, to communicate with the back-end server. This is crucial for sending and receiving data, user authentication, and other server-related tasks.
Routing: Express.js enables the definition of routes and endpoints for your application, which helps manage how client requests are processed. This is essential for handling different HTTP methods and serving specific URLs, ensuring a structured and organized application.
Middleware: Middleware functions in Express.js play a pivotal role in tasks like authentication, logging, error handling, and more. They help enhance the functionality of the server and provide a way to execute code in a specific order within the request-response cycle.
Integration with MongoDB: In the MERN stack, MongoDB is the NoSQL database used to store and retrieve data. Express.js facilitates the connection to MongoDB, allowing your application to interact with the database seamlessly. This integration is essential for creating dynamic and data-driven web applications.
Node.js: Express.js is built on top of Node.js, which is the server-side JavaScript runtime. Node.js provides the foundation for Express.js to work, making the MERN stack a full-stack JavaScript solution.
Summary:
Express.js serves as the backbone of the MERN stack, handling the server-side logic, routing, and API creation. It seamlessly integrates with MongoDB, the database component, and works alongside React, the front-end library, to create efficient and dynamic web applications. The MERN stack’s strength lies in its uniform use of JavaScript across the entire stack, making development smoother and more efficient.
JavaScript and MERN Stack
JavaScript and the MERN stack are closely related, with JavaScript serving as the foundational language that ties all the components of the MERN stack together. The MERN stack is named after four key technologies, all of which are closely intertwined with JavaScript:
MongoDB: MongoDB is a NoSQL database that stores data in a JSON-like format known as BSON (Binary JSON). JavaScript’s object-oriented nature and JSON compatibility make it easy to work with MongoDB, allowing developers to interact with the database using JavaScript.
Express.js: Express.js is a web application framework for Node.js, which is a server-side JavaScript runtime. Being built on Node.js, Express.js leverages JavaScript to create web servers and handle server-side logic, making it a seamless part of the MERN stack.
React: React is a JavaScript library for building user interfaces. It allows developers to create interactive and responsive front-end components for web applications. React is a central part of the MERN stack’s front-end development, enabling the creation of user-friendly and dynamic interfaces.
Node.js: Node.js is a server-side JavaScript runtime environment. It’s used in the MERN stack to run the back-end server and handle tasks such as routing, middleware, and database operations. Node.js’s non-blocking I/O and event-driven architecture make it well-suited for building high-performance web applications.
The strong connection between JavaScript and the MERN stack comes from the use of JavaScript across both the client-side (React) and server-side (Express.js and Node.js) components of the stack. This uniformity in programming language simplifies the development process and reduces the learning curve for developers. JavaScript’s versatility, asynchronous capabilities, and extensive ecosystem of libraries and tools make it a powerful choice for creating web applications within the MERN stack.
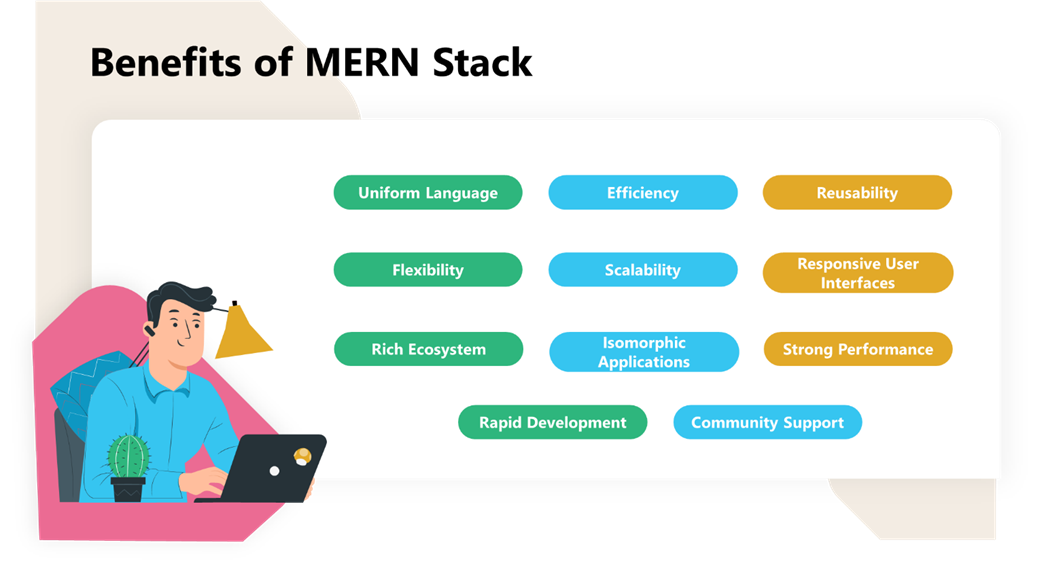
Benefits of Using MERN Stack
Using the MERN (MongoDB, Express.js, React, Node.js) stack for web development offers several notable benefits:
Uniform Language:
The MERN stack is built entirely on JavaScript, allowing developers to use a single programming language across the entire stack. This uniformity simplifies development, as there’s no need to switch between different languages for front-end and back-end tasks.
Efficiency:
Node.js, a key component of the MERN stack, is designed for asynchronous, non-blocking I/O operations. This means that web applications built with the MERN stack can handle multiple requests simultaneously, leading to faster and more responsive applications.
Reusability:
React, the front-end library in the MERN stack, promotes the creation of reusable UI components. This reusability not only speeds up development but also ensures consistency in the user interface, making it easier to maintain and update your application.
Flexibility:
MongoDB, the NoSQL database in the stack, offers a schema-less design, making it easy to adapt your database structure as project requirements evolve. This flexibility is particularly useful for agile development and rapidly changing data models.
Scalability:
MongoDB’s scalability is well-suited for applications with growing user bases and large amounts of data. You can easily scale your application horizontally, adding more servers to handle increased traffic.
Responsive User Interfaces:
React’s virtual DOM and component-based architecture make it easier to create dynamic and interactive user interfaces. Users experience faster page loading and smooth interactions, enhancing the user experience.
Rich Ecosystem:
Both React and Node.js have large and active developer communities. This results in a rich ecosystem of open-source libraries, packages, and tools that can be leveraged to streamline development and solve various challenges.
Isomorphic Applications:
MERN stack applications can be built to be isomorphic, meaning they can run on both the server and the client. This can improve SEO and provide faster initial page loads by rendering content on the server side.
Rapid Development:
The combination of Express.js and React allows developers to quickly create and prototype web applications. The stack’s simplicity and efficiency enable rapid development cycles, reducing time-to-market.
Strong Performance:
Node.js and React are known for their speed and efficiency, ensuring that MERN stack applications perform well even under high traffic loads.
Community Support:
The MERN stack has a vast online community, forums, and tutorials. This support network makes it easier to find solutions to common issues and stay up-to-date with best practices.
MERN stack’s benefits include a consistent and efficient development experience, fast and responsive user interfaces, adaptability to changing project requirements, and a strong developer ecosystem. These advantages make it an excellent choice for building modern web applications.
Key Components of MERN Stack
1.MongoDB
MongoDB is a document-oriented NoSQL database that stores data in BSON (Binary JSON) format. This structure allows for flexibility in handling different types of data. MongoDB’s key features include:
Scalability: MongoDB easily handles large amounts of data and traffic, making it an excellent choice for applications with growing user bases.
Aggregation Framework: Powerful aggregation capabilities for querying and data analysis.
2. Express.js
Express.js is a minimal and flexible Node.js web application framework. It simplifies the creation of web applications and APIs. Key features of Express.js include:
Middleware: Easily integrate third-party middleware to enhance your application’s functionality.
Routing: Define routes to handle different HTTP methods and URLs.
3.React
React is a JavaScript library for building user interfaces. It allows for the creation of reusable UI components, making it easier to manage and maintain your application’s front end. Key features of React include:
Virtual DOM: Efficient updates and rendering of components for improved performance.
Component-Based Architecture: Building applications as a collection of components simplifies development and maintenance.
4.Node.js
Node.js is a server-side JavaScript runtime that powers the back end of MERN applications. It offers the following advantages:
Non-Blocking I/O: Node.js is designed for asynchronous, non-blocking I/O operations, ensuring that your applications remain responsive.
Vast Ecosystem: A rich collection of libraries and modules available via npm (Node Package Manager).
Setting Up Your MERN Stack Development Environment
To get started with the MERN stack, you will need to set up your development environment. Here are the steps to follow:
Install Node.js: Download and install Node.js from the official website.
Initialize a Node.js Project: Create a new Node.js project using the “npm init” command.
Set Up MongoDB: Install MongoDB and create a database for your application.
Create an Express.js Application: Build the back end of your application using Express.js.
Develop the Front End with React: Design your application’s user interface using React.
Connect the Front End and Back End: Establish communication between the front end and back end of your application.
Building Your First MERN Stack Application
Creating your first MERN (MongoDB, Express.js, React, Node.js) application is an exciting journey into the world of modern web development. In this guide, we’ll walk you through the essential steps to get started and build your very own MERN application. By the end of this process, you’ll have a functioning web application with a back end and front end, ready to be deployed for the world to see.
Prerequisites
Before you dive into MERN application development, make sure you have the following tools and knowledge:
Node.js: Ensure you have Node.js installed on your computer. You can download it from the official website.
Text Editor: Choose a text editor or integrated development environment (IDE) to write your code. Popular options include Visual Studio Code, Sublime Text, or Atom.
MongoDB: Install MongoDB locally or use a cloud-based MongoDB service like MongoDB Atlas. You’ll need a MongoDB database to store your application’s data.
Command Line: Familiarize yourself with using the command line or terminal to run commands and navigate through your project.
Step 1—Install Node
To install Node, visithttps://nodejs.org/en/ You can choose between the LTS and current versions.
Step 2—Create a New Node Project
Let’s create a project directory for your Node project since you already have Node.js and MongoDB installed. Open a new terminal window and execute the following code to create a new Node project directory in any convenient location on your local machine. Then switch to that directory.
> mkdir myProject && cd myProject
> mkdir server && cd server
To start a new Node.js project, simply copy and paste the following code into a new file:
> npm init -y
A new package.json file will be created, containing information about your app and its dependencies.
Install the dependencies:
> npm install express cors dotenv
The above command uses some important keywords to install the necessary packages that we will use in our project. Here’s what each of these keywords does:
`express`: This installs the web framework for Node.js. Using this framework will make our life easier.
`cors`: This installs a package that allows cross-origin resource sharing in Node.js.
`dotenv`: This installs the module that loads environment variables from a `.env` file into the `process.env` file. This lets you separate configuration files from the code.
To check the installed dependencies, we can refer to the `package.json` file. It should list all the packages along with their versions.
Step 3—Create a Node.js Express Server
Start by creating a file named server.js. Then, type the following code into it and save:
myProject/server/server.jsconst express = require("express");const app = express();const cors = require("cors");require("dotenv").config({ path: "./config.env" });const port = process.env.PORT || 5000;app.use(cors());app.use(express.json());app.use(require("./routes/record"));// Get MongoDB driver connectionconst dbo = require("./db/conn");app.listen(port, () => { // Perform a database connection when server starts dbo.connectToServer(function (err) {if (err) console.error(err); }); console.log(`Server is running on port: ${port}`);});
Here, we are requiring express and cors to be used. The const port process.env.port will access the port variable from the config.env we require.
Step 4—Install Mongoose and MongoDB
To get started with MongoDB, we will be using the free tier ofMongoDB Atlas cloud-based database-as-a-service. It’s the easiest way to get up and running with MongoDB. For the frontend, we will use Mongoose, which is an asynchronous MongoDB object modeling tool.
You can installMongoose in your Node.js project’s package.json using npm. Simply navigate to your project folder and use the following command to install it:
> npm install mongoose
This command installs Mongoose and the MongoDB driver, allowing Node.js applications to connect to and manipulate data in the database.
Step 5—Connect to MongoDB Database
Open a terminal window in the ‘server’ directory and execute this command to connect to the database:
> touch config.env
To connect to your MongoDB Atlas database, you first need to assign the connection string to a new variable ‘ATLAS_URI’ inside the ‘config.env’ file. To do this, go to yourAtlas cluster and click on the ‘CONNECT’ button. This will launch the Cluster Connection Wizard. The Wizard will then guide you through the process of adding your current IP address to the IP Access List and creating a new MongoDB user (if you haven’t created one already). Make sure you note the username and password you use for the new MongoDB user as you’ll need it later.
Next, the Wizard will prompt you to choose a connection method. You need to select ‘ConnectYourApplication’. Then, when asked to select your driver version, choose ‘Node.js and 3.6 or later’. Finally, copy the provided connection string and paste it into your ‘config.env’ file. Your file should look like the example below:
Note: Replace <username> and <password> with your database credentials.
Then, create a new folder named ‘db‘ under the server directory.
> mkdir db && cd db
Inside it, create a file called conn.js. Here we can add the following code to connect to our database.
> touch conn.jsmyProject/server/db/conn.jsconst { MongoClient } = require("mongodb");const Db = process.env.ATLAS_URI;const client = new MongoClient(Db, { useNewUrlParser: true, useUnifiedTopology: true,});var _db;module.exports = { connectToServer: function (callback) {client.connect(function (err, db) { // Verify we got a good "db" object if (db) { _db = db.db("employees"); console.log("Successfully connected to MongoDB."); } return callback(err); }); }, getDb: function () {return _db; },};
Step 6—Create the Server API Endpoints/ Routes
After completing the database and server, it’s time to create the Server API endpoints. Start by creating a “routes” folder and adding “record.js” to it. Go back to the “server” directory and create the new directory and file.
> cd ../server && mkdir routes> touch routes/record.jscopy and paste the provided code into the "record.js" file located in the "routes" folder.myProject/server/routes/record.jsconst express = require("express");// recordRoutes is an instance of the express router.// We use it to define our routes.// The router will be added as a middleware and will take control of requests starting with path /record.const recordRoutes = express.Router();// This will help us connect to the databaseconst dbo = require("../db/conn");// This helps convert the id from string to ObjectId for the _id.const ObjectId = require("mongodb").ObjectId;// This section will help you get a list of all the records.recordRoutes.route("/record").get(function (req, res) {let db_connect = dbo.getDb("employees");db_connect .collection("records") .find({}) .toArray(function (err, result) { if (err) throw err; res.json(result); });});// This section will help you get a single record by idrecordRoutes.route("/record/:id").get(function (req, res) {let db_connect = dbo.getDb();let myquery = { _id: ObjectId(req.params.id) };db_connect .collection("records") .findOne(myquery, function (err, result) { if (err) throw err; res.json(result); });});// This section will help you create a new record.recordRoutes.route("/record/add").post(function (req, response) {let db_connect = dbo.getDb();let myobj = { name: req.body.name, position: req.body.position, level: req.body.level,};db_connect.collection("records").insertOne(myobj, function (err, res) { if (err) throw err; response.json(res);});});// This section will help you update a record by id.recordRoutes.route("/update/:id").post(function (req, response) {let db_connect = dbo.getDb();let myquery = { _id: ObjectId(req.params.id) };let newvalues = { $set: { name: req.body.name, position: req.body.position, level: req.body.level, },};db_connect .collection("records") .updateOne(myquery, newvalues, function (err, res) { if (err) throw err; console.log("1 document updated"); response.json(res); });});// This section will help you delete a recordrecordRoutes.route("/:id").delete((req, response) => {let db_connect = dbo.getDb();let myquery = { _id: ObjectId(req.params.id) };db_connect.collection("records").deleteOne(myquery, function (err, obj) { if (err) throw err; console.log("1 document deleted"); response.json(obj);});});module.exports = recordRoutes;
It’s time to start your server to test if it’s functional. Open a terminal in the same directory as your server.js file and copy:
> node server.js
If everything goes smoothly, you should be able to view the following output:
Server is running on port: 5000Successfully connected to MongoDB.
Let’s shift our focus to the front end, now that we’ve successfully wrapped up the back end. This is where we’ll really be able to showcase our creativity and provide an exceptional user experience.
Step 7—Create a React Application
To install your React application, you need to run the create-react-app command in the root directory of your project.
> npx create-react-app client
A new directory will be created for your React frontend app. Navigate to the client folder to view the React application code.
> cd client && ls
To proceed, open the “client” directory and launch a new terminal window. After that, you will need to install two extra dependencies.
> npm install bootstrapreact-router-dom
Bootstrap allows for quick deployment of pre-made templates and components for web applications, eliminating the need to write code from scratch. React–router-dom installs React router components for web applications.
Step 8—Set Up the React Router
To begin setting up the React Router, you should first clear out the contents of the src folder.
> rm src/**/*
Firstly, create a new folder, and then add two additional files named index.js and App.js to the folder.
> touch src/index.js src/App.js
To add the following code, go inside the src/index.js file:
import React from "react";import ReactDOM from "react-dom";import App from "./App";import { BrowserRouter } from "react-router-dom";ReactDOM.render( <React.StrictMode><BrowserRouter> <App /></BrowserRouter> </React.StrictMode>, document.getElementById("root"));
We use <BrowserRouter> to synchronize our UI with the browser’s URL for seamless component transitions.
Step 9—Create the React Components
To organize our code better, we will create a ‘components‘ folder inside the ‘src‘ directory. For every component we create, we will add a new .js file to this folder. Our app needs to perform three main tasks:
Create an employee
Edit employees
View all employees
To achieve these tasks, we will create four files for each: create.js, edit.js, navbar.js, and recordList.js.
The following code will enable users to create new records by submitting a create command to our server.
import React, { useState } from "react";import { useNavigate } from "react-router";export default function Create() {const [form, setForm] = useState({ name: "", position: "", level: "",});const navigate = useNavigate(); // These methods will update the state properties.function updateForm(value) { return setForm((prev) => { return { ...prev, ...value }; });} // This function will handle the submission.async function onSubmit(e) { e.preventDefault(); // When a post request is sent to the create url, we'll add a new record to the database. const newPerson = { ...form }; await fetch("http://localhost:5000/record/add", { method: "POST", headers: { "Content-Type": "application/json", }, body: JSON.stringify(newPerson), }) .catch(error => { window.alert(error); return; }); setForm({ name: "", position: "", level: "" }); navigate("/");} // This following section will display the form that takes the input from the user.return ( <div> <h3>Create New Record</h3> <form onSubmit={onSubmit}> <div className="form-group"> <label htmlFor="name">Name</label> <input type="text" className="form-control" id="name" value={form.name} onChange={(e) => updateForm({ name: e.target.value })} /> </div> <div className="form-group"> <label htmlFor="position">Position</label> <input type="text" className="form-control" id="position" value={form.position} onChange={(e) => updateForm({ position: e.target.value })} /> </div> <div className="form-group"> <div className="form-check form-check-inline"> <input className="form-check-input" type="radio" name="positionOptions" id="positionIntern" value="Intern" checked={form.level === "Intern"} onChange={(e) => updateForm({ level: e.target.value })} /> <label htmlFor="positionIntern" className="form-check-label">Intern</label> </div> <div className="form-check form-check-inline"> <input className="form-check-input" type="radio" name="positionOptions" id="positionJunior" value="Junior" checked={form.level === "Junior"} onChange={(e) => updateForm({ level: e.target.value })} /> <label htmlFor="positionJunior" className="form-check-label">Junior</label> </div> <div className="form-check form-check-inline"> <input className="form-check-input" type="radio" name="positionOptions" id="positionSenior" value="Senior" checked={form.level === "Senior"} onChange={(e) => updateForm({ level: e.target.value })} /> <label htmlFor="positionSenior" className="form-check-label">Senior</label> </div> </div> <div className="form-group"> <input type="submit" value="Create person" className="btn btn-primary" /> </div> </form> </div>);}
edit.js
The following code will serve as an editing component for our records. It will use a similar layout to the create component and will eventually submit an update command to our server.
import React, { useState, useEffect } from "react";import { useParams, useNavigate } from "react-router";export default function Edit() {const [form, setForm] = useState({ name: "", position: "", level: "", records: [],});const params = useParams();const navigate = useNavigate(); useEffect(() => { async function fetchData() { const id = params.id.toString(); const response = await fetch(`http://localhost:5000/record/${params.id.toString()}`); if (!response.ok) { const message = `An error has occurred: ${response.statusText}`; window.alert(message); return; } const record = await response.json(); if (!record) { window.alert(`Record with id ${id} not found`); navigate("/"); return; } setForm(record); } fetchData(); return;}, [params.id, navigate]); // These methods will update the state properties.function updateForm(value) { return setForm((prev) => { return { ...prev, ...value }; });} async function onSubmit(e) { e.preventDefault(); const editedPerson = { name: form.name, position: form.position, level: form.level, }; // This will send a post request to update the data in the database. await fetch(`http://localhost:5000/update/${params.id}`, { method: "POST", body: JSON.stringify(editedPerson), headers: { 'Content-Type': 'application/json' }, }); navigate("/");} // This following section will display the form that takes input from the user to update the data.return ( <div> <h3>Update Record</h3> <form onSubmit={onSubmit}> <div className="form-group"> <label htmlFor="name">Name: </label> <input type="text" className="form-control" id="name" value={form.name} onChange={(e) => updateForm({ name: e.target.value })} /> </div> <div className="form-group"> <label htmlFor="position">Position: </label> <input type="text" className="form-control" id="position" value={form.position} onChange={(e) => updateForm({ position: e.target.value })} /> </div> <div className="form-group"> <div className="form-check form-check-inline"> <input className="form-check-input" type="radio" name="positionOptions" id="positionIntern" value="Intern" checked={form.level === "Intern"} onChange={(e) => updateForm({ level: e.target.value })} /> <label htmlFor="positionIntern" className="form-check-label">Intern</label> </div> <div className="form-check form-check-inline"> <input className="form-check-input" type="radio" name="positionOptions" id="positionJunior" value="Junior" checked={form.level === "Junior"} onChange={(e) => updateForm({ level: e.target.value })} /> <label htmlFor="positionJunior" className="form-check-label">Junior</label> </div> <div className="form-check form-check-inline"> <input className="form-check-input" type="radio" name="positionOptions" id="positionSenior" value="Senior" checked={form.level === "Senior"} onChange={(e) => updateForm({ level: e.target.value })} /> <label htmlFor="positionSenior" className="form-check-label">Senior</label> </div> </div> <br /> <div className="form-group"> <input type="submit" value="Update Record" className="btn btn-primary" /> </div> </form> </div>);}
recordList.js
The following code fetches all the records in our database via GET.
import React, { useEffect, useState } from "react";import { Link } from "react-router-dom";const Record = (props) => (<tr> <td>{props.record.name}</td> <td>{props.record.position}</td> <td>{props.record.level}</td> <td> <Link className="btn btn-link" to={`/edit/${props.record._id}`}>Edit</Link> | <button className="btn btn-link" onClick={() => { props.deleteRecord(props.record._id); }} > Delete </button> </td></tr>);export default function RecordList() {const [records, setRecords] = useState([]); // This method fetches the records from the database.useEffect(() => { async function getRecords() { const response = await fetch(`http://localhost:5000/record/`); if (!response.ok) { const message = `An error occurred: ${response.statusText}`; window.alert(message); return; } const records = await response.json(); setRecords(records); } getRecords(); return;}, [records.length]); // This method will delete a recordasync function deleteRecord(id) { await fetch(`http://localhost:5000/${id}`, { method: "DELETE" }); const newRecords = records.filter((el) => el._id !== id); setRecords(newRecords);} // This method will map out the records on the tablefunction recordList() { return records.map((record) => { return ( <Record record={record} deleteRecord={() => deleteRecord(record._id)} key={record._id} /> ); });} // This following section will display the table with the records of individuals.return ( <div> <h3>Record List</h3> <table className="table table-striped" style={{ marginTop: 20 }}> <thead> <tr> <th>Name</th> <th>Position</th> <th>Level</th> <th>Action</th> </tr> </thead> <tbody>{recordList()}</tbody> </table> </div>);}
navbar.js
In the navbar.js component, we will create a navigation bar that links to the required components using the following code.
import React from "react";// We import bootstrap to make our application look better.import "bootstrap/dist/css/bootstrap.css";// We import NavLink to utilize the react router.import { NavLink } from "react-router-dom";// Here, we display our Navbarexport default function Navbar() {return ( <div> <nav className="navbar navbar-expand-lg navbar-light bg-light"> <NavLink className="navbar-brand" to="/"> <img style={{"width" : 25 + '%'}} src="https://d3cy9zhslanhfa.cloudfront.net/media/3800C044-6298-4575-A05D5C6B7623EE37/4B45D0EC-3482-4759-82DA37D8EA07D229/webimage-8A27671A-8A53-45DC-89D7BF8537F15A0D.png"></img> </NavLink> <button className="navbar-toggler" type="button" data-toggle="collapse" data-target="#navbarSupportedContent" aria-controls="navbarSupportedContent" aria-expanded="false" aria-label="Toggle navigation" > <span className="navbar-toggler-icon"></span> </button> <div className="collapse navbar-collapse" id="navbarSupportedContent"> <ul className="navbar-nav ml-auto"> <li className="nav-item"> <NavLink className="nav-link" to="/create"> Create Record </NavLink> </li> </ul> </div> </nav> </div>);}
Now, add the following code to the src/App.js file that we created earlier.
import React from "react";// We use Route in order to define the different routes of our applicationimport { Route, Routes } from "react-router-dom";// We import all the components we need in our appimport Navbar from "./components/navbar";import RecordList from "./components/recordList";import Edit from "./components/edit";import Create from "./components/create";const App = () => {return ( <div> <Navbar /> <Routes> <Route exact path="/" element={<RecordList />} /> <Route path="/edit/:id" element={<Edit />} /> <Route path="/create" element={<Create />} /> </Routes> </div>);};export default App;
Step 10—Testing
It looks like you have finished creating the necessary components, and have successfully connected your React application to the back end using the fetch method. This method provides a cleaner and simpler way to handle HTTP requests, which is used in create.js, edit.js, and recordList.js files to manage HTTP requests.
To start your application, please follow these steps: open a new terminal window and navigate to the ‘server’ directory. Then execute the following command:
> node server.js
Open a new terminal window in the client directory and run the following command:
> npm start
You should be able to view the application in your browser.
MERN Stack Applications
1.Facebook
One of the most famous examples of a MERN stack application is “Facebook.” Facebook is a social media platform that utilizes the MERN stack for its web development. React is used for building the user interfaces, while Node.js, Express.js, and MongoDB work together on the server side to handle data storage, server logic, and API interactions. This combination of technologies has contributed to Facebook’s success in delivering a highly interactive and data-intensive web application, serving billions of users worldwide.
2.Instagram
Instagram is a prominent MERN stack application that focuses on photo and video sharing, as well as social networking. It utilizes MongoDB to store user data and media files efficiently. Express.js handles the routing and middleware, ensuring secure and smooth interactions between users and the platform. React, as the front-end library, plays a crucial role in creating a highly interactive and responsive user interface. This combination of MERN components allows Instagram to deliver features like real-time photo and video uploads, comments, likes, and a seamless user experience.
3.WhatsApp
WhatsApp, a widely-used messaging application, relies on the MERN stack for its web application. The stack enables real-time communication, ensuring instant message delivery and synchronization across devices. MongoDB serves as the data store for user messages and multimedia content. Express.js manages routes and handles API requests, allowing for secure message transmission. React plays a role in crafting an intuitive and user-friendly chat interface. The MERN stack is well-suited for managing vast volumes of real-time data and ensuring a reliable messaging experience.
4.Netflix
Netflix, a leading streaming platform, chooses React for building its user interfaces. This selection of React enables Netflix to provide a responsive, user-friendly experience to its subscribers. The React library allows for the creation of dynamic and interactive user interfaces, ensuring that users can seamlessly navigate the vast library of content, personalize their viewing experience, and enjoy high-quality streaming. While Netflix doesn’t utilize all MERN components, React, as part of the MERN stack, contributes to an engaging and visually appealing user interface.
5.Airbnb
Airbnb, a global online marketplace for lodging and travel, employs the MERN stack for its web development. React is instrumental in creating the user interface, which allows users to search, view, and book accommodations worldwide. Node.js and Express.js power the server-side, handling user requests and database interactions efficiently. MongoDB stores a vast amount of listing and user data. A vacation rentalapp like Airbnb showcases the scalability of the MERN stack, enabling millions of property listings and facilitating bookings across different regions, all while delivering a user-friendly and intuitive experience.
These MERN Stack applications underscore the versatility and scalability of the MERN stack. Whether it’s managing multimedia content, facilitating real-time messaging, providing streaming services, or offering a global travel marketplace, the MERN stack’s combination of MongoDB, Express.js, React, and Node.js contributes to the success and user engagement of these high-performance web platforms, which cater to millions or even billions of users worldwide.
6.5 Spheres of Fit – MERN Stack App
The 5 Spheres of Fit app, developed by TechnBrains in the wellness industry, embodies a holistic approach to wellness. In line with its mission to enhance fitness and overall life wellness, the app has been meticulously crafted using cutting-edge technologies and services. TechnBrains tackled various challenges, such as data security, user engagement, content curation, interdisciplinary expertise, and monetization strategy, to create a robust and user-friendly platform. It focuses on five key areas:
Physical
Mental
Social
Financial
Educational spheres
Wrapping it up
In this comprehensive guide, we’ve explored the MERN stack, its components, and the benefits it offers for web development. By following the steps outlined in this guide, you can create your own MERN-based projects and build high-performance web applications. Whether you’re a beginner or an experienced developer, or looking tohire app developers mastering the MERN stack is a valuable skill that can open up a world of possibilities in web development. Good luck with your MERN journey!
Overview: PWAs leverage the latest technologies to blend the best of web and mobile apps. In this article, we will explore recent advancements in browsers and the opportunities available to developers to create a new era of web applications.
Progressive Web Apps (PWAs) are similar to regular websites, but they are hosted on a server and accessed through URLs instead of app stores. They use Service Workers technology to work offline and cache the website on the user’s device. The web app manifest feature and push notifications are also supported.
While a PWA is similar to a responsive website, it is more advanced. In fact, PWAs use modern browser features to provide a better user experience. The technology behind PWAs includes service workers, push notifications, web app manifests, and offline support. PWAs use the application cache feature of HTML5 to store data offline, making them function similarly to native apps.
While understanding it in more depth, PWAs are an innovative technology that allows websites to function like native apps and provide an improved user experience. They enable caching of the entire website, including content, which eliminates the need to be online.
Progressive Web Apps
Progressive web apps have the potential to become the next big trend for mobile web development. Initially proposed by Google in 2015, they have gained significant attention due to their ease of development and their ability to enhance the user experience almost instantly.
A progressive web app combines the best features of web and mobile applications, taking advantage of the latest technologies. It is essentially a website built using web technologies but acts and feels like a mobile app. Recent improvements in browsers and the availability of service workers, Cache, and Push APIs have made it possible for web developers to offer users the ability to install web apps to their home screen, receive push notifications, and even work offline.
Compared to native applications in app stores, progressive web apps are more accessible to build, deploy, and maintain. They take advantage of a larger web ecosystem, plugins, and community. Web developers will appreciate that a website can be built in less time and that they do not need to maintain an API with backward compatibility. All users will run the same version of the website’s code, unlike the version fragmentation of native apps, making deployment and maintenance much more accessible.
Why Choose Progressive Web Apps Over Native Apps?
Progressive web apps offer several advantages over native apps. Research shows that traditional apps lose 20% of their users for every step between the user’s first contact and using the app. In contrast, progressive web apps allow users to start using the app immediately without the need to download, install, or open it separately. When the user revisits the app, they are prompted to install it and upgrade to a full-screen experience.
However, native apps have their benefits. Mobile apps with push notifications retain users up to three times more than apps without push notifications. Additionally, users are three times more likely to reopen a mobile app than a website. Furthermore, a well-designed mobile app consumes less data and runs faster because some resources are stored on the device.
Features Progressive Web Apps
If you’re interested in developing a progressive web app, it’s essential to understand what characteristics it should possess. Here are the defining traits of a progressive web app:
Progressive: This means that a progressive web app should work on any device, and it should use any available features on the user’s device and browser.
Discoverable: Since a progressive web app is a website, it should be searchable in search engines. This is beneficial because it allows the user to locate the app compared to native apps quickly.
Linkable: A well-designed web app should use the URI to show the current state of the application, making it easier to reload or retain the app’s state when a user bookmarks or shares the app’s URL.
Responsive: The UI of a progressive web app should be designed to fit the device’s form factor and screen size.
App-like: A progressive web app should resemble a native app and be built using the application shell model, which keeps page refreshes to a minimum.
Connectivity-independent: A progressive web app should be capable of working in areas with low connectivity or even offline.
Re-engageable: A progressive web app should be able to bring users back to the app by using features such as push notifications, similar to native apps.
Installable: A progressive web app can be installed on the user’s home screen, making it easily accessible.
Fresh: Whenever new content is published, and the user is connected to the internet, that content should be made available in the app.
Safe: Due to the intimate user experience and the ability to intercept network requests through service workers, it is crucial that a progressive web app is hosted over HTTPS to prevent man-in-the-middle attacks.
Advantages of Progressive Web Apps
Progressive web apps leverage the advantages of a mobile app while avoiding the complexities of maintaining a separate app. This results in improved user retention and performance.
Most handheld devices are well integrated with HTML5 APIs. While it may be difficult to list all the device integration APIs, let’s take a look at the additional features that Progressive Web Apps (PWAs) offer over Responsive Web Apps (RWAs):
Adding an icon to the home screen is possible with PWAs but not with RWAs.
Enabling the icon in the apps list is also possible with progressive web apps through the use of WebAPKs. This allows PWAs to be packaged into installable Android packages.
PWAs can launch in full-screen mode and have access to the clipboard.
Hardware-accelerated 2D/3D graphics can be achieved through HTML5 Canvas or WebGL in PWAs.
Accessing the file system and reading user-selected files is possible in any browser, but specifically in Chrome and Opera with progressive web apps.
Finally, progressive web apps offer slick, smooth UIs with 60fps animations.
Limitations of Progressive Web Apps
It’s great to have progressive web apps, but why isn’t everyone using them? While progressive web apps can perform most of the functions that most apps require, there are still some features that are not supported by PWAs due to technological limitations.
For instance, compared to native apps, PWAs do not fully support some telephony features like intercepting SMS or calls, Send SMS/MMS, Getting user’s phone number services, Voice mails, Making phone calls without Dialer dialog, Access to contacts, calendar, and browser, and access to alarms.
Access to low-level hardware features and sensors like the flashlight and atmospheric pressure sensor is not integrated with progressive web apps. Additionally, access to task management modifying system settings, logs, or device-based functions is a limitation of PWAs.
Transforming a Responsive Website into a PWA
Converting a responsive website to a Progressive Web App (PWA) is possible, but it involves a specific process. Although both technologies share the same premise, there are specific criteria that a website must meet to be considered a PWA, which Google has provided.
To transform a responsive website into a progressive web app, the following baseline criteria checklist must be met:
The website must be served over HTTPS.
Pages must be responsive and optimized for tablets and mobile devices.
All app URLs must load while offline, meaning that various pages in the PWA should present some content even when there is no internet connection.
Metadata must be provided for the “Add to Home screen” functionality.
The website should load fast, even on a 3G connection.
The site must work cross-browser.
Page transitions should feel snappy and not feel like they block the network, even on a slow network connection, as perceived performance is critical.
Each page should have a canonical URL.
By meeting these criteria, a responsive website can be transformed into a PWA, providing users with a better experience and more functionality.
Additional Criteria for PWA Transformation
Below is a checklist of exemplary criteria for transforming a website into a Progressive Web App (PWA):
Ensure that Google indexes your site content.
Provide Schema.org metadata and social metadata. This will help improve your site’s visibility in search engines.
Use canonical URLs if your content is available via multiple URLs.
Remember that pages use the History API, and content should not jump while the page loads.
Make sure that pressing back from a detail page retains the scroll position on the previous list page.
Ensure that the content is easily shareable from standalone or full-screen mode.
Make the site responsive across phone, tablet, and desktop screen sizes.
Use app install prompts sparingly and avoid excessive use.
Intercept the Add to Home Screen prompt.
Ensure that the first load is high-speed, even on 3G.
Use cache-first networking.
Appropriately inform users when they’re offline.
Provide context to the user about how notifications are enabled.
Avoid overly aggressive UI elements encouraging users to turn on Push Notifications.
Dim the screen when the permission request is showing.
Push notifications should be timely, precise, and relevant.
Provide controls to turn notifications on and off.
Use the Credential Management API to ensure that users are logged in across devices for sites with sign-in flow.
For sites accepting payments, enable users to pay quickly via native UI from the Payment Request API.
Recommended Open-Source Tools for Progressive Web Apps
Tons of open-source tools are available out there. Here are a couple of easy-to-use and powerful ones:
This is an open-source project by Google that is frequently updated to keep it in sync with other open-source projects that it leverages. Its benefits include:
Great for beginners
Significant reduction in setup time
Optimizes app delivery to the device using the PRPL pattern
Pushes critical resources for the initial route
Renders the initial route naturally and pre-caches the remaining routes, with a lazy-load to create remaining routes on demand
Webpack
When custom app development is needed, Webpack fits the stack well. It relies on a module bundler for JavaScript applications, and some of its advantages include:
It makes creating dependency graphs much more manageable
Reduces the number of calls to and from a server by moving to CommonJS or ES6 modules, resulting in a faster app
Accesses all non-code assets (images, CSS, fonts, etc.) via JavaScript as objects that have significant speed benefits
On the con side, Webpack is not perfect. Its learning curve is a little steep (but manageable), and the documentation code is not great. However, it’s essential for complex, front-end-driven progressive websites.
Knockout
This is one of the best tools to build lightweight progressive apps. The creators of Knockout use PWA in conjunction with JavaScript to handle Model-View-View Model (MVVM) bindings. Here are the key benefits of Knockout that have kept it in our toolbox:
The library can be easily integrated into existing websites without requiring extensive modifications. Despite being just 13KB in size, it offers a wide range of functionalities. Knockout is an excellent framework to use for smaller projects that require fast execution. There are two significant reasons for this. Firstly, Knockout extends HTML, making it easier to learn without the need for JSX. Secondly, it comes with templating capabilities that enable developers to build complex applications without having to duplicate DOM elements.
Wrapping it Up
In summary, Progressive Web Apps (PWAs) provide a valuable middle ground between traditional websites and native mobile apps, offering improved performance and offline capabilities. While they have numerous advantages, they also come with limitations, especially in terms of certain telephony features and low-level hardware access. Transforming a responsive website into a PWA requires meeting specific criteria, and there are various open-source tools available to facilitate the process. Progressive web apps are a compelling solution in today’s tech landscape, offering a versatile and user-friendly approach to web and app development.
TechnBrains can help you build Progressive Web Apps
At TechnBrains, we have the recipe for crafting the best Progressive Web Apps (PWAs) that empower your business in the digital landscape. Our approach to PWA development is a harmonious blend of creativity, technology, and user-centric design.
Innovative Ideation: We begin by delving deep into your objectives and target audience. Understanding your unique needs is our foundation. We then brainstorm creative ideas that align with your vision.
User-Centric Design: The success of a PWA hinges on user experience. Our design team meticulously crafts interfaces that are intuitive, engaging, and responsive, ensuring seamless user interaction.
Cutting-Edge Development: Our development process involves harnessing the latest web technologies, such as Service Workers and responsive design, to build PWAs that load instantly, work offline, and adapt to any device.
Performance Optimization: We fine-tune PWAs to be blazing fast, making sure that users stay engaged and conversions are maximized.
Security: Security is paramount. We implement HTTPS and other security measures to protect user data and provide a safe browsing experience.
Testing and QA: Rigorous testing ensures that your PWA is bug-free, compatible with various browsers, and performs flawlessly.
Ongoing Support: Our commitment doesn’t end at deployment. We provide ongoing support, maintenance, and updates to keep your PWA at peak performance.
By choosing TechnBrains, you’re not just getting a PWA; you’re getting a digital powerhouse that elevates your online presence, engages your audience, and drives your business forward. We’re dedicated to delivering PWAs that stand out, and we’re here to lead you on the journey to digital excellence.
In a world full of bright ideas, some of the best ones turn into mobile apps that we use every day. You have seen those apps with over a thousand downloads, and you might have your idea that could be the next big thing.
During the first quarter of 2024, users downloaded around 25.6 billion applications from Google Play. On the other hand, the number of mobile app downloads from the Apple App Store was about 8.4 billion.
Downloads are just one part of the equation, The real question is: “What will the app development cost be in 2024?”
App development costs range from $10,000 to $50,000 for a simple mobile app, and can go up to $1,000,000 for more complex or advanced apps.
If you are curious about this exciting world of app development, you are in the right place. We are here to break it down for you in simple terms so you can understand how much it costs to turn your idea into a real app. The world of app development has room for everyone, from regular folks with great ideas to big businesses looking to innovate.
Your idea could change lives, make tasks easier, or even start a completely new trend. In this journey, we will help you explore the world of app development costs. We will make it easy to understand so you can get a grip on what it takes to turn your idea into an app that people will love. So, get ready to dive into the world of app development, where your ideas can become real digital wonders.
Protecting Your Idea
You’ve got a fantastic idea for an app, and you’re eager to dive into the world of app development. But before you take the plunge, it’s crucial to consider how to protect your idea. One way to do that is by patenting your app concept. You can also read our guide for how to patent an app idea to get more insights on protecting your app idea. By securing your intellectual property rights, you ensure that your unique idea remains your own. While patenting may add to your initial expenses, it’s a vital step in safeguarding your vision.
Creativity is the Key to App Development
As you ponder the cost of making an app, it’s essential to keep those creative wheels turning. Your initial idea might evolve, or you might come up with new features and functionalities along the way. Keeping your idea fresh and adaptable can lead to a more successful app. Innovation is an ongoing process, and your app’s success might depend on staying open to new possibilities.
How Much Does It Cost to Build an App?
Wondering “How much does it cost to develop an app in 2024”? The cost of app development hinges on the complexity of your project. In 2024, three broad categories define this complexity:
App Complexity
Description
Cost Range
Development Timeframe
Examples
Simple Apps
Basic features like user registration and simple UI
$30,000 – $50,000
4.5 – 11 weeks
Flashlight, Weather apps
Complex Apps
Advanced features like real-time updates and UI
$100,000 – $250,000+
7 – 16 weeks
Social Media, E-commerce apps
Advanced Apps
Highly intricate features like AI and virtual reality
$250,000 – $1,000,000+
11.5 – 16 weeks
Healthcare, Enterprise-level apps
1. Simple Apps
Developing a basic app in 204 could cost anywhere between $15,000 and $50,000. A simple app usually includes features like a user interface, user registration and login, and basic functionality and takes 4.5 to 11 weeks to develop. Examples of simple apps include flashlights, calculators, and weather apps.
2. Complex Apps
Developing a complex app in 2024 can cost between $100,000 and $300,000 or even more. A complex app usually has advanced features such as real-time updates, push notifications, third-party integrations, and advanced user interfaces. The development time for a complex app can range from 7 to 16 weeks. Technologies like the Internet of Things (IoT) and Augmented Reality (AR) are often integrated into complex apps, enhancing their functionality but also increasing development time and cost. An App like Snapchat, e-commerce apps, and gaming apps are perfect examples of complex apps.
3. Advanced Apps
On the other hand, developing an advanced app in 2024 can cost between $300,000 and $1,000,000 or more. Advanced apps typically have highly complex features such as Artificial Intelligence (AI), Blockchain Development, and machine learning. The development time for an advanced app can range from 11.5 to 16 weeks. Apps that leverage AI for predictive analytics or Blockchain for secure transactions fall under this category. Healthcare apps, fintech apps, and enterprise-level apps are all covered in advanced apps.
Can I make an app by myself?
Creating an app all by yourself is possible if you have enough technical knowledge and expertise. However, in most cases, app development is not a one-person task. It involves a team of developers or you may hire app developers, UI/UX designers, project managers, and quality assurance engineers who work together to turn your idea into a fully functional app. The duration of this process is usually 3-6 months, depending on the number and complexity of features.
Now, let’s delve deeper into the process of finding out the cost of building an app.
Factors That Affect App Development Cost
Understanding the expenses associated with app development is a multifaceted endeavor. The ultimate cost of bringing your app idea to life hinges on a myriad of influential factors. Let’s take a closer look at the key determinants that significantly impact the financial aspects of app development:
1. Outsourcing vs. In-House App Development
When developing an app, you must decide whether to use an in-house team or to outsource the process to a third-party agency. Choosing an in-house team provides a significant advantage in terms of direct communication and complete control over the development process. Lets take a look at them below:
Aspect
Outsourcing App Development
In-House App Development
Direct Control
Limited
High
Proximity
Geographical separation
Local
Communication
Virtual and remote
Face-to-face meetings
Talent Pool
Wide talent pool
Local talent constraints
Initial Investments
Lower initial investments
Higher initial investments
Hiring and Bureaucracy
Reduced administrative tasks
Administrative responsibilities
Time Zone Differences
Potential time zone challenges
No time zone issues (local)
Expertise Levels
High expertise levels
Dependent on in-house team expertise
Flexibility
High
Relatively lower
Cost Flexibility
Cost-effective
Cost constraints
Need for High Seed Money
Not required
Required
In-House Development: Opting for an in-house development team offers advantages such as direct communication and full control over the development process. However, it often involves challenges like talent shortages, substantial initial investments, and dealing with hiring and bureaucratic complexities.
Outsourcing: Choosing to outsource app development provides access to an extensive talent pool, high expertise levels, cost-effectiveness, flexibility, and the elimination of the need for substantial initial investments. While it might entail some disadvantages, such as time zone differences and a lack of personal control, the benefits often outweigh the drawbacks.
2. Location and Structure of a Development Team:
If you decide to outsource app development, you will need to choose a country to outsource to. There are several options available:
Nearshore Outsourcing: This strategy involves collaborating with a development company from your own country or a nearby one, with a minimal time zone difference of 2-4 hours. Nearshore outsourcing offers the advantage of relative geographic proximity, which can facilitate real-time communication and collaboration.
Offshore Outsourcing: Offshore development extends to companies located anywhere in the world, often spanning more than four time zones. While this approach can pose challenges related to time zone differences and less direct control, it is often favored due to its significant cost advantages. Many companies choose offshore development to leverage lower labor costs and access a diverse talent pool while managing to maintain effective communication through careful selection of development partners with overlapping working hours.
Region
iOS
(Avg. $/Hr)
Android
(Avg. $/Hr)
Cross-Platform
(Avg. $/Hr)
Canada
90 – 120
80 – 140
90 – 120
The USA
60 – 120
60 – 120
60 – 130
Latin America
28 – 90
28 – 90
40 – 160
The UK
60 – 75
60 – 75
55 – 75
Europe
35 – 55
35 – 55
30 – 50
Ukraine
40 – 78
38 – 60
40 – 78
South Africa
45 – 80
40 – 80
40 – 80
India
22 – 90
15 – 25
20 – 30
Southeast Asia
23 – 55
30 – 45
30 – 45
Asia
25 – 35
20 – 30
25 – 35
Australia
90 – 120
100 – 120
90 – 120
3. Features and Functionality
The features and functionality of your app are paramount when it comes to cost estimation. This crucial aspect can significantly impact both the complexity of the development process and the final expenses involved. To understand the role of features in app development costs, let’s delve into the details:
Complexity and Variety of Features:
The more intricate and diverse the features you plan to incorporate into your app, the more intricate and time-consuming the development process becomes. Features such as real-time updates, third-party integrations, push notifications, advanced user interfaces, and other advanced functionalities can substantially increase development expenses. These complex features often require more extensive coding, testing, and fine-tuning.
Customization and Uniqueness:
Custom features, designed to meet specific and unique requirements, typically demand a higher level of expertise and development effort. Customization can add both to the time and cost of development, as developers need to design, code, and thoroughly test these tailored elements to ensure they function seamlessly within the app.
Integrations and Compatibility:
Features that involve integrating with external systems, services, or APIs can drive up development costs. Such integrations require in-depth technical expertise, comprehensive testing, and ongoing maintenance to ensure compatibility and functionality.
User Interface Design:
The sophistication of the app’s user interface also plays a significant role in cost determination. Elaborate and visually appealing interfaces, rich in animations and user-friendly design, tend to require more development effort. Achieving a high level of design finesse often involves additional design and development hours.
To illustrate the impact of features on development costs, here’s a table summarizing how different types of features can influence your project:
Type of Feature
Influence on Cost
Description
Basic Features
Moderate
Standard functionalities like user registration and basic user interface design, with limited additional complexity.
Real-time Updates
Significant
Implementing features that require real-time data synchronization and constant updates can drive up costs.
Third-Party Integrations
Significant
Integrating with external services, APIs, or databases can be complex and entail additional development efforts.
Push Notifications
Moderate
Implementing push notifications, while common, requires precise coding and testing.
Advanced User Interfaces
Significant
Complex, visually-rich user interfaces with intricate animations and interactions can substantially increase costs.
It’s essential to work closely with your development team to determine the specific features your app will require. A well-defined feature list enables precise cost estimation, effective project management, and the successful execution of your app development project.
4. Android vs. iOS
When venturing into app development, one of the foremost decisions you’ll face is choosing the platform or platforms on which your app will operate. The primary contenders in this arena are Android app development and iOS app development, each with its unique set of advantages and challenges.
Platform Overview
Android: This platform, developed by Google, powers a vast array of devices. It boasts a larger global market share, making it an attractive option for reaching a broad audience. The Android ecosystem is diverse, supporting numerous device manufacturers and versions of the operating system.
iOS: Apple’s iOS platform, on the other hand, is known for its user-friendly, premium devices. The iOS user base is generally more homogeneous, as Apple controls both hardware and software. While iOS app development enjoys a significant market share in certain regions, it is typically more prevalent in North America and Europe.
Development Costs:
Choosing between native and hybrid development depends on project requirements, budget and app vision. It’s a critical decision that impacts success, so consider carefully.
Native App Development: This approach involves crafting an application tailored specifically for a single platform—either iOS or Android. While native apps offer unparalleled performance and user experience, they come with a catch: if you aim to target both platforms, you’ll need to create two distinct apps. This inherently escalates the overall app development cost.
Hybrid App Development: On the flip side, hybrid app development is all about versatility. These apps are engineered to function seamlessly on multiple operating systems, which can significantly reduce your app’s development expenses. However, this cost-efficiency comes with its own set of challenges. Hybrid apps may exhibit unstable performance, a variable user experience depending on the device in use, and certain technical limitations.
Platform-Specific Considerations
Fragmentation (Android): Developing for Android can be more complex due to the platform’s fragmentation. You need to account for a variety of screen sizes, resolutions, and device capabilities. This can lead to additional design and testing efforts.
App Store Fees (iOS): When releasing an app on the Apple App Store, you’ll need to pay an annual developer fee. This cost is absent from Android app development, where publishing on the Google Play Store has a one-time registration fee.
To help clarify the cost implications, here’s a table summarizing the key aspects of Android and iOS app development:
Aspect
Android
iOS
Platform Market Share
Larger global market share
Smaller global market share
Development Costs (Single Platform)
Lower initial development costs
Lower initial development costs
Developing for Both Platforms
Higher development expenses due to creating two separate apps
Higher development expenses due to creating two separate apps
Fragmentation
Account for a wide range of screen sizes and device capabilities
More uniform device ecosystem with fewer variations
App Store Fees
No annual developer fee; one-time registration fee
Annual developer fee for app distribution on the Apple App Store
Android App Development can Cost between $5,000 to $50,000, widely depending on the features, complexity and the development team’s location. As for the iOS App Development cost, it is around $10,000 to $100,000+.
5. Visual Design Complexity
When it comes to app development, the visual design of your application is not just about aesthetics; it’s a fundamental element that can substantially impact the overall cost. Let’s delve deeper into the role that visual design complexity plays in shaping the financial aspects of your app development journey.
High-Quality Custom Designs:
When you envision a visually stunning app with intricate, tailor-made designs, expect that such aesthetics will come at a price. Custom designs involve the creation of unique graphics, icons, and user interface elements that perfectly match your app’s concept. This meticulous work requires the skill and time of talented designers, resulting in higher development expenses. The intricate nature of these designs contributes to both the cost and time aspects of development.
Animations and Interactive Elements:
If your app calls for animations, transitions, or interactive elements that provide users with a dynamic and engaging experience, be prepared for added development costs. Creating smooth, seamless animations and interactive features demands not only design expertise but also intricate coding and testing to ensure everything functions flawlessly. These dynamic elements, while enhancing user engagement, can increase the complexity and thus the cost of development.
Complex User Interfaces:
Apps with intricate user interfaces, characterized by multiple layers, interactive components, and advanced functionalities, often require a significant investment. These interfaces, while offering a rich user experience, necessitate more development time and expertise, which directly translates to higher costs.
Simple and Straightforward Designs:
On the other hand, if your app’s design adheres to simplicity and straightforwardness, you can enjoy cost-efficiency. Minimalistic designs with clean lines, basic color schemes, and uncomplicated user interfaces are more straightforward to create, resulting in reduced development expenses. While they may not possess the visual flair of highly complex designs, these simpler designs can be both budget-friendly and user-friendly.
6. Backend Infrastructure
The backend infrastructure, including databases, servers, and the technical framework supporting your app, plays a substantial role in determining costs. Complex backend systems, such as those incorporating artificial intelligence or real-time data processing, typically require more extensive development work and, subsequently, increased expenses.
7. App Maintenance Costs
While determining the initial cost of developing an app is crucial, it’s equally essential to comprehend that expenses extend beyond the app’s deployment and market launch. App maintenance is a recurring necessity that requires financial preparedness.
As per insights from GoodFirms, the annual expenditure for app maintenance is estimated to be around $21,000. However, it’s vital to understand that the financial commitment doesn’t diminish once the app is live; it evolves over time.
Research reveals that approximately 50% of the app development cost will be allocated to maintenance during the first year. Subsequently, for the second year, the financial allocation drops to roughly 25%. As the app matures, you can anticipate spending between 15% to 25% of the initial development cost for each subsequent year (data sourced from Outsystems, 2018-2019).
So, what exactly does app maintenance encompass?
Bug Fixing and Quality Assurance: Ensuring that your app remains free of bugs and maintains a high level of quality is an ongoing task. This involves identifying and rectifying issues to enhance the user experience.
Stability and Performance Improvements: As technology evolves, your app should evolve with it. Regular updates are required to enhance the stability and performance of your app, ensuring it remains competitive in the market.
Code Optimization: Optimizing the app’s code is a continuous effort to improve its efficiency and reduce resource consumption.
Upgrade to the Latest OS Versions: Operating systems evolve, and your app must keep up. Regular updates are essential to ensure compatibility with the latest OS versions.
Implementation of New Features: To stay relevant and appealing to users, implementing new features and functionalities is a part of app maintenance. This involves planning and development efforts.
Support of the Latest Version of 3rd Party Services: Many apps rely on third-party services, and these services may update or change over time. Ensuring seamless integration and functionality often requires updates and adaptations.
When allocating your budget, it’s imperative to allocate resources not only for the initial development but also for ongoing app maintenance. This bifurcation allows you to ensure the longevity and success of your app in a dynamic and ever-evolving digital landscape.
Mobile Apps Cost By Category
The app development world offers endless opportunities across various industries. Whether it’s healthcare, education, entertainment, or any other field, there’s likely an app idea waiting to be discovered. Take some time to explore different industries and consider how your app concept might fit in. By branching out beyond your initial vision, you might stumble upon an industry with vast potential.
In the vast landscape of app development, opportunities span across a multitude of industries. Think of it as an expansive playground where creativity knows no bounds. Whether you’re intrigued by healthcare, education, entertainment, or any other sector, there’s a high likelihood that your app idea has a place within it. Take some time to embark on a journey through different industries, envisioning how your app concept might find its unique role.
The education sector is ripe for app innovation. From personalized learning platforms to interactive study tools, mobile learning apps are changing how we acquire knowledge and skills. These apps tailor learning experiences to individual needs, making education more accessible and engaging.
Healthcare app development
Healthcare apps have the power to transform patient care and administrative tasks. They can help with telemedicine app development, streamline appointment scheduling, monitor vital signs remotely, and improve the quality and accessibility of healthcare services.
Real estate apps help users buy, sell, or rent properties online. They often feature property listings, virtual tours, and location details. These apps simplify communication between agents and buyers. The development includes integrations for maps and payment gateways. Real estate apps are becoming essential in the housing market.
Retail app development
Apps in Retail are changing the way we shop, enhancing in-store experiences and streamlining online purchases. Retail app development can provide personalized recommendations or simplify the checkout process, making shopping more convenient and enjoyable.
Automotive App Development Automotive apps are used for vehicle tracking, diagnostics, and maintenance. They offer features like GPS navigation and real-time vehicle status updates. Some apps connect to cars for remote control or data analysis. Automotive apps are crucial for managing fleets and improving driver safety. They also enhance the overall driving experience.
SaaS App Development SaaS apps provide software services over the cloud that are accessible anytime. They’re subscription-based and can range from productivity tools to business management platforms. SaaS apps reduce the need for complex installations. They are scalable, secure, and easily updated, helping businesses cut down on IT costs.
AI App Development AI apps use machine learning and algorithms to automate tasks. They offer personalized recommendations, chatbots, and predictive analytics. AI can improve decision-making and optimize processes. Development includes training AI models with large datasets. AI apps are used in the healthcare, finance, and customer service industries.
IoT App Development IoT apps connect smart devices to the internet for real-time control and monitoring. They manage devices like smart thermostats, cameras, and wearables. IoT apps improve home automation, healthcare, and logistics, and their demand is growing with more smart devices.
AR App Development AR apps blend digital elements into the real world using the device’s camera. They are used for games, virtual shopping, and education. AR enhances user experience by making interactions more immersive. These apps require advanced image recognition and 3D modeling. AR is transforming industries like retail, gaming, and real estate.
Blockchain App Development Blockchain apps ensure secure and transparent transactions through decentralized systems. They are often used for cryptocurrency exchanges, supply chain tracking, and smart contracts. Blockchain’s immutability makes these apps highly reliable. Development involves cryptography and distributed ledgers. Blockchain apps are shaping the future of finance and security.
Entertainment app development
Entertainment apps encompass gaming, content streaming, event planning, and more. They have the potential to create engaging experiences, help users discover new forms of entertainment, and make leisure time more enjoyable.
E-commerce app development
E-commerce apps play a pivotal role in modern retail. They can enhance the online shopping experience with features such as secure payment methods, real-time inventory updates, and personalized shopping recommendations.
Fintech App Development
Modern FinTech apps such as PayPal, Robinhood, and Stripe have become indispensable parts of our daily routines. Finance apps offer tools for budgeting, investing, and tracking expenses. They empower users to take control of their finances, offering insights and recommendations for better money management.
Hospitality mobile app development
Apps in the hospitality sector can enhance guest experiences in hotels, restaurants, and travel. Think of an app that allows guests to check in, order room service, or book activities conveniently from their smartphones.
Social media app development
Developing a social media app opens the gateway to a global stage of connections and interactions. With features designed for content sharing, networking, and engagement, these apps have the power to unite people, foster communities, and provide a platform for self-expression. Privacy and content management are pivotal concerns, making user data protection and content moderation essential aspects of development. The social media landscape thrives on innovation, offering vast opportunities for those ready to redefine the way we connect and communicate in the digital age.
How Much Does it Cost to Build an App: Calculation Techniques
When it comes to estimating the cost of building an app, precision is key. Accurate cost calculations are vital for budgeting and resource allocation. Here are some techniques and methods used in the industry to determine the cost of app development:
Total Development Time x Hourly Rate = App Development Cost
Feature-Based Costing:
This method involves breaking down the app into individual features and functionalities. Each feature is assigned a cost based on its complexity and development requirements. The cumulative cost of all features provides an estimate of the total project cost.
Time and Materials (T&M):
T&M pricing is often used for projects where the scope is not well-defined. In this approach, the client pays for the actual time spent on development and the materials used. It provides flexibility but can be less predictable in terms of cost.
Fixed Price Model:
In this method, the development company and the client agree on a fixed price for the entire project based on the project’s scope and requirements. It provides cost predictability but may be less flexible for changes.
Expert Judgment:
Experienced app developers and project managers rely on their expertise to estimate costs. They consider factors like complexity, technology stack, design, and integration requirements. This method can be quick but may have a margin of error.
Prototyping and MVP:
Creating a prototype or a Minimum Viable Product (MVP) allows for cost estimation based on the initial development phase. This method provides a foundation for estimating the total project cost.
Historical Data:
Past app development projects with similar features and complexity can serve as a reference point for estimating costs. Historical data helps in making informed projections.
Cost Per Hour or Developer Rate:
Some companies charge based on hourly rates of developers involved in the project. Multiplying the hourly rate by the estimated development time provides the cost estimate.
Online Cost Calculators:
Several online tools and cost calculators are available, allowing users to input project details and receive rough cost estimates based on industry averages and benchmarks.
Market Research:
Researching the costs of similar apps in the market can offer insights into the budget required. It helps to gauge the competitive landscape and understand what users expect for a given price range.
Consulting App Development Firms:
Seeking consultation from app development firms like TechnBrains can provide a tailored and accurate cost estimate. These experts consider specific project requirements and industry standards.
It’s important to note that the complexity of the app, its features, technology stack, design, and other factors all influence the final cost. The choice of method depends on the project’s nature, and often a combination of techniques is used to arrive at a comprehensive and accurate cost estimate.
How do apps make money?
the mobile app industry has become a flourishing landscape, providing not just convenience and entertainment but also a plethora of opportunities for entrepreneurs and developers to turn their innovations into profitable ventures. But the fundamental question remains, “How do apps make money?” This inquiry unveils a world of strategies and monetization models, each catering to specific app types and user behaviors.
So, ‘How do apps make money?’ The answer might be through different App strategies and monetization models, each tailored to specific app types and user behaviors.
1. In-App Advertising:
One of the most common revenue streams for free apps is in-app advertising. Apps display ads to users, and the app owner earns money based on user interactions or impressions.
2. Freemium Model:
Under this model, apps offer a free version with basic features and the option to upgrade to a premium, paid version with additional functionalities. Users who desire enhanced experiences can opt for in-app purchases.
3. In-App Purchases:
Apps can offer a range of virtual or physical goods for sale within the app. This includes digital products, subscriptions, or even physical merchandise. Users pay to access these items.
4. Subscription Models:
Many content-based apps employ subscription models, offering users premium content for a recurring fee. Examples include streaming services, news apps, and fitness apps.
5. Affiliate Marketing:
Some apps generate income by promoting other companies’ products or services. When users click on affiliate links within the app and make a purchase, the app owner earns a commission.
FAQs
How much does app development cost?
The cost of app development varies with project complexity. Basic apps typically range from $5,000 to $10,000, while complex apps can cost $50,000 to $75,000 or more.
What’s the development timeline?
In most cases, app development takes a minimum of three months, with approximately 40% of projects extending beyond six months.
What are mobile app maintenance costs?
Mobile app maintenance costs are roughly $21,000 annually, with 50% of the initial development cost spent in the first year, about 25% in the second year, and 15%-25% for subsequent years.
Overview: Retail app development has helped businesses grow in no time; learn if you should for Native or Cross-Platform App Development for greater ROI.
Are you an entrepreneur looking for immense growth? then retail app development is the one you are looking for. With 2023 incubating digital growth for mobile apps, digitalization is the top priority for startups and business owners. Back then who would’ve thought you could make bank transactions with just a tap, have your favorite meal delivered with food delivery apps or even learn how to patent an app idea from the comfort of their homes. In this blog you will be learning about:
How To Create a Retail App
Key Features to Add in Retail App
How Much Does It Cost to Create Retail App Development
Native vs. Cross-Platform App Development for Retail
Pro Tips For Retail Businesses
What are Retail Mobile Apps
A retail app is a software solution that facilitates online commercial transactions between consumers and businesses. These apps are not just tools for making purchases; they’re companions that enhance the entire shopping experience. Retailers can harness the power of Retail App Development to gather invaluable insights into customer behavior and preferences, driving strategic decision-making and marketing efforts.
How Retail Apps helped us
It’s remarkable how, just a few years ago, the idea of a mobile app connecting you with your distant loved ones, booking a cab, your daily steps, delivering meals to your doorstep, purchasing tickets, and offering a wealth of information about everything was merely a concept. Today, the power to access such conveniences is just a few taps away. In this new era, consumers can effortlessly procure goods through retail apps.
The rise of digital technology has brought about a revolutionary change in the way sellers reach out to their customers worldwide. With Retail App Development connecting buyers and sellers from every corner of the world, shopping has never been more convenient. This not only gives sellers access to a global user base but also enables customers to enjoy the luxury of shopping from the comfort of their own homes. The idea of a mobile app that bridges the gap between buyers and sellers was once a distant dream, but technology has made it a reality. This transformation has brought a new era to the retail industry, making it more accessible and efficient than ever before.
Analyzing the Retail App Market
Before we delve deeper into the nuances of retail app development, let’s examine some market statistics that shed light on the significance of this industry in the years to come.
72% of consumers believe that mobile apps make buying more convenient.
In the previous month, 58% of people claim that they had used a shopping app.
49% of shopping app users use apps to get discounts or special deals, while 37% indicated they will use a shopping app specifically to make a purchase.
58% of millennials report using apps more frequently than the mobile web.
71% of respondents who have used retail apps said they enjoy using mobile applications to shop.
57% of them stated they regularly shop using mobile apps. Furthermore, 46% stated that they are more inclined to shop using mobile apps than online.
How To Create a Retail App
Embarking on the journey of retail app development involves several critical steps that span the entire app development process. Let’s guide you through these pivotal stages, ensuring your project’s success.
Planning/Discovery Phase: This initial stage involves in-depth research to understand the requirements of your business model. It’s crucial to select a retail app development company, define features, and conduct market research to establish a robust foundation for your app.
Design: The design phase is where your app takes shape visually. A well-designed user interface and user experience are paramount in today’s interconnected world. Social networking integration and unique features enhance user engagement, and choosing a development company that understands your vision is crucial.
Features and Tech Stack: Innovative features and a robust tech stack are the building blocks of a successful retail app. Our section below outlines essential features and the technology stack used in retail apps, providing you with valuable insights.
Development: Once you’ve grasped the feature set and technology, it’s time to engage the services of a top-tier retail app development company in the USA. Collaborate closely to integrate your app’s critical features, ensuring a seamless user experience.
Testing: Beyond development, rigorous testing is a non-negotiable phase. Testing identifies and rectifies any errors or bugs before launch, safeguarding your app’s reputation and user experience.
Key Features in Retail App Development
Below are some of the key features that will take your retail app to the next level:
Customer Panel – Retail App Development
Sign up/Sign In: Simplify user onboarding with straightforward sign-up and sign-in processes.
Order History: Enable users to track their past purchases and review order details.
Address: Streamline the delivery process by allowing users to store multiple delivery addresses.
Wish List: Enhance the shopping experience with a wish list feature for bookmarking products.
In-App Wallet: Offer an encrypted wallet for convenient fund management.
Categories: Organize products into categories for easy navigation.
Search Filter: Facilitate product discovery through a user-friendly search filter.
Notifications: Keep users updated on the latest news and events via an in-app notification bar.
Cart: Allow users to add items to their cart for a seamless shopping experience.
Track Order: Provide real-time order tracking for transparency and convenience.
Payment Gateway: Ensure secure payments through integrated payment gateway options.
Text Notification: Keep users informed about orders and shipping details via SMS notifications.
Admin Panel – Retail App Development
Content Management: Admins can add, edit, and remove products, pricing, and user information.
Inventory Control: Maintain control over inventory by updating product information.
Product Specifications: Offer detailed product information for a smooth shopping experience.
Order Management: Manage orders effectively with order tracking and logistics management.
Real-Time Reports and Analytics: Stay updated with real-time reports and analytics.
Payment Management: Streamline payment confirmation and evaluation processes.
Estimating the Cost of Retail App Development
Before venturing into retail app development, it’s crucial to gauge the associated costs. The development of a retail app’s price tag can vary significantly based on several factors, including:
App complexity
App size
Platform selection
Mobile app development company fees
Development timeline
To provide an approximate cost for Retail App Development, small businesses may spend between $8,000 and $12,000, medium-sized organizations between $15,000 and $20,000, and large-scale enterprises between $20,000 and $25,000. However, it’s vital to note that these figures can fluctuate based on the specifics of your project.
In Closing, your journey through the intricate world of retail app development begins here. By understanding the core elements of this dynamic industry, you are well-prepared to navigate the challenges and opportunities that lie ahead. So, without further ado, let’s delve deeper into this blog and equip you with the knowledge on whether to choose native or cross-platform to make your retail app dreams a reality.
Native vs. Cross-Platform App Development for Retail App Development
When it comes to retail app development, you face a critical decision: should you opt for native app development or cross-platform app development? Let’s explore the basics and then Native vs. Cross-Platform App Development so that you can make an informed decision.
Native App Development
Native app development involves creating a dedicated mobile app for a specific operating system, such as iOS app development or Android app development. These apps are designed using platform-specific languages and development tools, like Swift for iOS and Java or Kotlin for Android. Here are some key advantages of native app development for retail app development:
Better Performance
Native apps are renowned for their superior performance, as they are optimized to its fullest. They provide smoother user experiences through the host device, resulting in faster load times and smoother user experiences.
User Experience
Native apps provide a seamless and intuitive user experience, aligning with the platform’s design and user interface guidelines. This familiarity enhances user engagement and satisfaction.
Access to Device Features
Native apps can tap into a device’s hardware and software features, such as camera access, GPS, and push notifications. This opens up possibilities for creating highly interactive and feature-rich retail apps.
Security
Native apps benefit from the stringent security measures of their respective platforms, ensuring the protection of sensitive customer data.
Cons
Building separate apps for iOS and Android can be time-consuming and costly. You need to maintain two separate codebases, which can be challenging. Any updates or changes need to be implemented twice, once for each platform.
When to Choose Native for Retail
High-end retail brands, where user experience is paramount, should opt for native Retail App Development to provide a premium shopping experience.
If your retail app is central to your business model and generates a significant portion of your revenue, native is the way to go.
When your app requires access to advanced device features, like AR technology or in-depth analytics, native is the better choice.
Cross-Platform App Development
Cross-platform app development for Retail App Development involves building a single app that can run on multiple platforms. This is achieved through frameworks like React Native, Flutter, or Xamarin. Here’s why cross-platform development is an attractive choice for retail apps:
Cost-Effective
Building a single app that works on both iOS and Android can be more cost-effective than creating two separate native apps.
Faster Development
Cross-platform development often leads to faster time-to-market, as you’re working with a single codebase.
Consistency
Cross-platform apps can maintain a consistent look and feel across different platforms, simplifying branding and user experience.
SimplifiedMaintenance
Updates and bug fixes can be implemented once and applied to both iOS and Android, streamlining maintenance.
Cons
Cross-platform apps may not perform as well as native apps, particularly for resource-intensive tasks. Access to certain device features may be restricted, limiting the functionality of your app. While improving, the user experience may not be as seamless as native apps.
When to Choose Cross-Platform for Retail
Smaller businesses with limited resources can benefit from cross-platform development as it’s cost-effective.
If you want to test an app concept quickly and cost-effectively, cross-platform development is ideal.
If your retail app doesn’t require extensive use of device-specific features and aims for a broader reach, cross-platform can suffice.
The Right Choice for Your Retail App
Making the right choice between native and cross-platform app development for your retail app is a crucial decision that will significantly impact your app’s performance, user experience, and long-term success. Let’s delve deeper into the factors that can guide your choice and explore scenarios where one approach might be more suitable than the other:
User Base and Market Reach
Consider your target audience and geographical reach. If your retail business serves a diverse customer base using various devices and platforms, cross-platform development can provide a wider reach. It allows you to cater to both iOS and Android users without disproportionately favoring one over the other. This can be particularly advantageous if you’re looking for Retail App Development to expand globally and wish to minimize development costs.
On the other hand, if your retail business caters to a specific niche or region where one platform dominates, such as iOS in North America or Android in certain emerging markets, you might prioritize native development for a more optimized user experience.
App Complexity and Performance Demands
The complexity of your retail app plays a pivotal role in the development approach you choose. If your app involves intricate features, high-performance demands, or real-time data processing, native development is likely the preferred route. Native apps can take full advantage of the device’s hardware capabilities and deliver seamless and responsive experiences, critical for complex retail applications.
Conversely, for less complex retail apps that focus on content delivery, online shopping, and simple user interactions, cross-platform development can be a cost-effective choice. You can reach a broader audience without compromising on essential functionality.
Development Resources and Budget
Your available development resources, including budget and time, are vital considerations. Native development typically requires separate development teams and more extensive resources. If you have the financial means and are willing to allocate the necessary time and budget for both iOS and Android development, native apps can offer the best performance and user experience.
Cross-platform development shines in resource efficiency. You can save time and money by maintaining a single codebase. This is a compelling option for businesses with tighter budgets or shorter timeframes. Keep in mind, however, that while cross-platform development may be less costly upfront, it might incur additional costs in the long run for addressing performance optimization and potential framework updates.
Future Growth and Updates
Consider your retail app’s long-term prospects. Native apps offer greater flexibility for future updates and feature enhancements. You have complete control over optimizing your app for each platform, ensuring it remains competitive as technologies evolve. If you anticipate significant future growth or plan to introduce advanced features, native development offers a more robust platform for expansion.
Cross-platform apps may require a closer eye on the evolution of the selected framework and potential compatibility issues. They are well-suited for rapid development cycles and feature updates, but if your retail business has ambitions of pushing the boundaries of innovation, native development may offer more latitude.
User Experience and Branding
The user experience is a cornerstone of retail app success. Native apps provide a tailored experience consistent with each platform’s design and user interface guidelines. This can enhance brand identity and user engagement. If you prioritize a finely tuned and platform-specific user experience, native development is the way to go.
Cross-platform development can deliver a consistent look and feel across platforms, ensuring a unified brand identity. While it may not provide the same level of platform-specific optimization, it offers efficiency in delivering a cohesive brand experience.
PRO TIPS FOR RETAIL BUSINESSES
If your retail business falls into any of these categories, go for:
Fashion Retailer: A high-end fashion brand focusing on premium user experience and augmented reality (AR) features should opt for native development.
Local Grocery Store: A neighborhood grocery store aiming for cost-effectiveness and a simple shopping experience can benefit from cross-platform development.
Electronics Retailer: A retailer dealing in electronics, where access to device features is essential for product demos and reviews, should choose native development.
Online Marketplace: A large online marketplace catering to various vendors and products may find cross-platform development cost-effective and time-efficient.
In the end, your choice between native and cross-platform app development hinges on a thorough assessment of your retail app’s unique needs and your strategic business goals. It’s a decision that requires careful consideration, and there is no one-size-fits-all answer. By aligning your choice with your target audience, app complexity, available resources, long-term plans, and desired user experience, you can make an informed decision that positions your retail app for success in the dynamic and ever-evolving retail landscape.
TechnBrains – Your Retail App Development Partner
Choosing the right partner for app development is paramount, and TechnBrains is the ideal choice for several compelling reasons. With a dedicated team of experts, we bring a wealth of knowledge and understanding of the retail industry to the table. Our tailored solutions cater to the unique needs of your retail business, whether you’re a fashion brand, local grocery store, or electronics retailer.
We pride ourselves on staying at the forefront of technology trends, ensuring that your retail app is equipped with cutting-edge features and capabilities. User-centric design is a core focus, guaranteeing an intuitive and visually appealing app. Seamless integration with your existing systems, robust data security, and a commitment to your long-term success are at the heart of what we do.
In the fiercely competitive retail market, TechnBrains provides the differentiating factor you need to thrive. We’re not just a development partner; we’re your pathway to success in the digital realm. Choose TechnBrains for retail app development that exceeds industry standards and empowers your business to excel.
Businesses often face a pivotal decision when establishing their online presence – should they opt for a traditional website or a sophisticated web application? The choice between a web app and a website can significantly affect user experience, functionality, and overall success. In this comprehensive guide, we’ll explore the distinctions of web app vs website, helping you make an informed decision tailored to your specific needs.
What Is a Website?
A website, often referred to as the digital face of your business, is a collection of interconnected web pages accessible through a unique domain name. These web pages are versatile canvases, capable of housing text, audio, video, documents, and various Internet-accessible content. When comparing web app vs website, traditional websites often focus on presenting static visual and textual information. In contrast, the ever-evolving landscape of web technologies has ushered in a new era.
Today, websites are not confined to passive information displays. Modern web development allows for the creation of interactive web spaces, blurring the lines between web app vs website, websites and applications. These dynamic websites go beyond the basics of HTML and CSS, venturing into the realm of advanced programming languages and databases. The result? A seamless, user-centric experience.
Unlike their static counterparts, dynamic websites use cutting-edge web design tools to offer personalized content to users. Your website can adapt its presentation based on factors such as the user’s location, time, date, and more. This versatility is what sets dynamic websites apart, making them invaluable for businesses looking to engage a diverse online audience.
Regardless of the kind of website or web app vs website you choose to create for your business, there’s one fundamental rule to follow: populate it with original, meaningful content. Your website’s content is its soul, the reason why visitors choose to explore your digital space. In a world brimming with information, authenticity is your most potent asset. Ensure that your content is not plagiarized or AI-generated, but rather a reflection of your unique perspective and expertise.
What Is a Web Application?
A web application, often referred to as a web app, is a versatile software accessible through a web browser. What sets web applications apart from their mobile and desktop counterparts is that they don’t necessitate downloads. Users can conveniently access web apps through a simple URL, just like they would with websites. These applications share many programming languages and technologies with websites, but the development of web applications, in the web app vs website comparison, is generally more intricate. This complexity arises from their ability to store and manipulate data based on user input, making them powerful tools.
Web applications shine in their capability to help users accomplish a wide array of tasks. Whether you need to track expenses, register for classes, create compelling advertisements, scan and convert files, or perform countless other functions, web apps have got you covered. It’s important to note that nearly all web apps involve server-side processing. Apps requiring server-side processing are dynamic, whereas those that don’t are static. However, stationary web applications are a rare find.
If you’re considering creating a web application for your business, it must serve a purpose users find valuable. After all, web apps that don’t provide value won’t see much use. Businesses favor web applications for several reasons. They offer scalability, eliminate the need for mobile app store approval, support all modern browsers, and are compatible across various platforms, making them a wise choice for businesses of all sizes.
Web app vs Website
While websites and web applications share some similarities, they represent distinct stages in the evolution of the online world. Understanding the pivotal differences between these two digital entities is essential in navigating the digital landscape effectively. Here, we delve into the core disparities that set websites and web applications apart. When considering the choice between a web app vs website, these distinctions become even more crucial.
Aspect
Web App
Website
Functionality
Interactive, user manipulation.
Informative, limited interaction.
Complexity
Complex, advanced programming.
Less complex, static content.
Access
Requires registration and authentication.
Public access, no authentication
Functionality
From a user’s perspective, the most pronounced disparity between web app vs website lies in their functionality. Web app vs website differentiation becomes evident in their user experience. Websites primarily serve as informative platforms, providing content that users can view, read, or listen to. However, interaction is limited, and users cannot actively manipulate the content. In stark contrast, web applications are designed to empower users. They offer not only viewable content but also incorporate interactive elements, enabling users to engage and manipulate data actively. Think of a form on a website as a primary example of interactive web content. Essentially, any online service that involves active user participation can be classified as a web application.
Complexity
Web applications are undeniably more complex than websites, emphasizing the importance of understanding the differences between web app vs website. While websites consist of static web pages, modern web development standards have introduced interactivity, but they remain relatively straightforward compared to web applications. The intricacy of web app vs website extends beyond mere functionality. They require robust backend services, accommodate various user levels, and possess data processing capabilities. Moreover, ensuring the security of web app vs website necessitates advanced solutions. Building web applications often requires employing not only standard web technologies like JavaScript, HTML, and CSS but also advanced programming languages and frameworks such as PHP, alongside server-side scripts. Additionally, user experience (UX) and user interface (UI) design play an integral role in web app vs website, as users actively interact with these platforms, making intuitive and engaging design imperative.
Access
Public access characterizes websites, welcoming all visitors without the need for registration or authentication. In contrast, in the web app vs website debate, web applications nearly always mandate user registration and authentication. This requirement arises from the personalized nature of the services they offer. Take, for instance, banking applications – while they provide similar services to all account holders online, each user’s experience is tailored to their unique banking information. Thus, user authentication is fundamental for delivering customized services.
Web app vs Website: Which Is Right for My Business?
Now that you’re well-informed about the distinctions between websites and web applications, including the key decision factor of web app vs website, you’re probably pondering which is the ideal choice for your business. Making this decision can be challenging, but it all comes down to your goals and vision.
If you aim to introduce your business and its products or services to users, a website is likely your best bet. On the other hand, if you intend to offer a service to users, then developing a web application is the way to go. You can also go for best website builders to get a website that will out perform your competition. The lines between websites and web applications can blur when you want to enable user registrations or facilitate product purchases.
Why Should I Develop a Website?
1. Create Social Proof
In today’s information-rich environment, consumers have an abundance of data at their fingertips. Modern websites play a vital role in creating social proof for businesses. Most individuals research a company online before making a purchase.
To build social proof, websites use user reviews, trust badges, and performance-related data strategically. For instance, if your business manufactures cars, showcasing a JD Power award on your website is a valuable form of social proof. Without a website, it’s challenging to disseminate award information, positive reviews, and key data.
2. Showcase Product or Service Offerings
The primary reason companies create websites is to showcase their products or services. Despite the rise of social media and various apps, a website remains the best platform to provide users with in-depth insights into your offerings, making it a crucial choice in the web app vs website debate. With a website, you can offer detailed descriptions, virtual models, answers to frequently asked questions, and demonstrations of your products or services.
Even if you don’t sell products online, having a website is valuable, especially for businesses selling high-value or luxury products and services. People prefer to research a product or service before making a purchase.
3. Aid in Branding Efforts
Building and promoting a brand is a time-consuming effort that requires alignment across all your marketing endeavors. A website is one of the most effective ways to establish and reinforce your brand’s identity. It serves as a constant reminder to both consumers and your team of your company’s brand guidelines.
Think of your website as a tool to make a lasting impression on your target audience. Use it to set the tone of your brand, make stylistic choices, and create content in line with your branding strategy. Building a successful brand often starts with a website, and when considering the choice between a web app vs website, it plays a pivotal role in shaping your brand’s online presence.
4. Provide Customer Support
A website offers a convenient means of providing support to your customers 24/7. Many people prefer self-service support, and your website can provide answers to frequently asked questions, troubleshooting guidance, and an automated online chat feature to assist users in resolving common issues.
Modern consumers expect to find solutions to their problems online. Using your website to provide answers and guidance to users encountering issues not only pleases your customers but also fosters brand loyalty. You can’t predict when a customer will need support, but with a website, your business is always ready to assist customers.
Why Should I Develop a Web Application?
Still uncertain about whether a website or a web application suits your needs? To add complexity to the decision, many websites include web applications for specific services. Here’s when you should opt for a web application:
1. Users Will Manipulate Information
The hallmark of a web application is its interactivity. While modern websites offer more interactivity, if users need to input and manipulate data, a web application is the superior choice. There are numerous scenarios where users may need to use data.
For instance, if your goal is to enable users to input and submit payment information for online purchases, a web application is essential. Any web service functioning as an online tool performs better as a web application rather than a website.
2. You Need Authentication
Do you require users to log in? If authentication is necessary, a web application is the ideal solution. While it may seem that both websites and web applications offer authentication, websites with authentication functionality employ web applications to deliver this service.
In many cases, web applications are developed to complement existing websites. This common practice can blur the distinction between web applications and websites. Remember that websites and web applications are distinct but frequently used together.
3. You Want to Avoid App Store Approval
If you intend to create an application that users can use on their mobile devices without going through the app store approval process, web applications are an excellent choice. Businesses are increasingly turning to web applications to provide rich mobile experiences that bypass the iOS App Store and Google Play Store.
Progressive Web Apps (PWAs) are revolutionizing mobile development. PWAs are web applications that look and feel like native mobile apps. They can even send push notifications and utilize other native device features.
4. You Want to Control All Updates
A web application may be the best fit for your business if you want to maintain complete control over the update schedule for all users. Traditional software requires users to update their applications when new updates are released manually. Most people have delayed updating software for various reasons.
Web applications can be uniformly updated at the source, sparing users from manual updates. Your business can enhance security measures and ensure a consistent user experience with a web application.
All things considered
While websites can incorporate app-like components to allow users to complete tasks, distinguishing between websites and web apps can remain challenging. If you’re uncertain about the best direction for your business, consider consulting with an app development partner. An experienced web design company can assist you in designing and developing the most suitable solution for your business. Focus on obtaining the right solution for your business and leave the semantics of website versus web application to the experts in web design.
TechnBrains for Web Design and Development
When it comes to navigating the dynamic realm of web design and development, TechBrains stands out as the premier choice. Our expertise transcends the traditional boundaries of web app vs website, ensuring that your digital presence is optimized for excellence. TechBrains delivers state-of-the-art solutions, tailored precisely to your needs. With a keen understanding of the nuances of web app vs website, we craft interactive and visually captivating platforms. We recognize the significance of choosing between a web app vs website and guide you to the ideal solution. TechBrains transforms your vision into a reality, offering web solutions that not only captivate but also perform seamlessly.
Overview: For entrepreneurs and startups with brilliant app ideas in mind, it is crucial to know how to patent your idea before discussing it with anyone. In this blog, we will provide a complete guide on how to patent an app idea with a simple process. So why wait? Learn how to patent an idea below.
The reason we are here is the question, “Can I patent an app idea?” The answer is this: Yes. Yes, for sure, you can. The next question that arises is, “How to patent an app idea?” The answer is TechnBrains. Being the Next-Gen mobile app development company in the USA, we are here to give you a detailed guide about how to patent an app idea, Types of Patent Applications, the Eligibility Criteria to Qualify for A Patent, and how TechnBrains can assist you with it.
The Census Bureau, An official website of the United States government, projected that there have been 32,219 new business startup ideas during September 2023. With such a high competition, you might be wondering if my idea will be patented. Will it get to the market before anyone does?
The answer is App ideas can be protected under intellectual property law, particularly trademark, patent, and mobile app copyright or patent law. However, you may be wondering whether you can patent your app. Many startups and entrepreneurs believe that before starting the mobile app development process, their app idea is essential in order to prevent others from copying, using, or selling it.
What Does it Mean to Patent a Mobile App Idea?
Patenting a mobile app idea means legally securing your intellectual property rights to your invention. In essence, it grants you exclusive rights to make, use, and sell your app for a specified period, typically 20 years. During this time, no one else can create a similar app without your permission. Patenting ensures your app remains unique and can lead to significant benefits in the long run.
What are the Different Types of Patent Applications?
When exploring the process of how to patent an app idea, it’s important to understand that there are two distinct types of patent applications: the Provisional Application and the Non-Provisional Application. Let’s delve into these in detail below:
Provisional Application
A Provisional Patent Application (PPA) is a fantastic starting point when you’re eager to safeguard your groundbreaking app idea. Before diving into the full-fledged patent application, this preliminary step is a lifesaver, especially in the first crucial 12 months. It grants you the treasured “Patent Pending” status, protecting your concept from copycats.
During this year, you have the golden opportunity to refine your “How to Patent an App Idea,” seek potential investors, or conduct market tests with a Minimum Viable Product (MVP). The best part? It’s remarkably cost-effective, saving you from the immediate need to hire a patent attorney.
Over 90% of utility patents are approved by the U.S. government for new or valuable inventions. If you’re ready to kickstart your app journey with a Provisional Application, TechnBrains can guide you through the process seamlessly.
Pro tip: This option is swift and efficient, but remember, it won’t transform into a final patent automatically.
What to Include in Your Provisional Patent Application:
Details about the inventor’s residence.
A concise yet captivating title for your invention.
Attorney information (if applicable).
A docket number to keep things organized.
An address for correspondence.
Specifics about any involved U.S. government agencies (essential when filing within the U.S. via USPTO).
Non-Provisional Application
On the flip side, the Non-Provisional Application is the heavyweight champion of patent filings. Unlike its provisional counterpart, it’s an extensive and intricate process. This is where you transform your innovative concept into a full-fledged patent, ready for evaluation and approval by the USPTO.
In this realm, claims and specifications are your bread and butter. You need to provide a comprehensive description of your invention, including legally defined claims to protect your intellectual property. It’s not a stroll in the park, but the rewards are worth it.
Pro tip: If you’re seeking legitimacy and long-term patent protection, filing a Non-Provisional Application is your ultimate destination in the journey of How to Patent an App Idea.
So, whether you’re starting with a provisional application or diving straight into the non-provisional one, remember that every successful app journey begins with securing your unique idea. TechnBrains is here to make your patenting process smoother so you can focus on what you do best – innovating and creating remarkable apps.
Types of Mobile App Ideas You Can Patent
Developers and entrepreneurs are continually coming up with groundbreaking app ideas that can transform the way we interact with technology. The good news is that many of these innovative app concepts, including How to Patent an App Idea, can be protected through patents. Let’s explore the various categories that will serve as a mobile app patent example. Let’s start:
1. Mobile Gaming Apps
Mobile gaming has become a massive industry, and it’s not limited to just casual games. If you have a unique and innovative concept for a mobile game that hasn’t been seen before, you may be able to secure a patent for it. This can encompass anything from novel gameplay mechanics to inventive in-game features.
2. A.R./VR-based Apps
Augmented Reality (A.R.) and Virtual Reality (V.R.) are taking mobile apps to a completely new level. We can say that for a fact because our A.R. V.R. app development has helped people revolutionize their business in unimaginable ways. Apps that blend the digital and physical worlds or immerse users in virtual environments offer exciting opportunities for patent protection, especially if you are wondering how to patent an app idea. Whether it is an A.R. navigation app or a VR-based training simulator, inventive ideas are ripe for patenting.
3. Healthcare Apps
The healthcare sector has seen a surge in mobile apps designed to improve patient care, streamline processes, and enhance medical research. Suppose you have a unique healthcare app idea that you are wondering “How to build a Healthcare App.” This is your sign to start building it. It can monitor health metrics, provide telemedicine services, or assist with medication management, and it may qualify for patent protection.
4. IoT Apps
The Internet of Things (IoT) has revolutionized the way devices and objects communicate with each other. IoT apps that facilitate this communication, control smart home devices, or enhance automation can be innovative and patent-worthy. If you’re wondering how to patent an app idea in the realm of IoT, our guide can help you navigate the process effectively. Competent and skilled engineers can help you with IoT app development. You can provide an idea for mobile apps that offer improved connectivity with an all-inclusive integration of appliances, devices, and machines so that everything is easy to operate, redefining the concept of interconnectedness.
5. Social Networking Apps
Social networking apps continue to redefine how we connect and share information. Unique features or methods for enhancing user engagement and interaction within a social network app can be idea patented. If you’re wondering How to Patent an App Idea, read on for essential guidance on protecting your innovation.
6. Enterprise Apps
In the corporate world, mobile apps have become essential tools for improving productivity and communication. If your app idea is tailored to meet specific business needs, you should definitely go for enterprise app development. This app will let you offer novel solutions or enhance workplace efficiency, and it may be eligible for patent protection.
7. Education and Learning Apps
With the growth of e-learning and digital education, there’s a wealth of opportunities for inventive education apps. Whether it’s a gamified language learning app or an innovative virtual classroom, educational apps that offer unique teaching methods or features can be considered for patents.
In the context of How to Patent an App Idea, these are just a few examples of the diverse mobile app categories that can potentially receive patent protection. However, it’s essential to work with a qualified patent attorney to determine the eligibility of your specific app idea and navigate the patent application process effectively.
Remember that patents not only protect your intellectual property but can also provide a competitive edge in the dynamic world of mobile app development. If your app idea falls into one of these categories, such as How to Patent an App Idea, and meets the criteria for patentability, it’s worth exploring the patent application process to safeguard your innovative creation.
How to Check Whether Your App Idea Has Already Been Patented or Not?
Before embarking on the exciting journey of developing your mobile app idea and learning how to patent an app idea, it’s essential to ensure that your innovation stands out in the crowded digital landscape. One critical step in this process is determining whether your app concept has already been patented by someone else.
Patenting your app can provide valuable protection for your intellectual property, but it’s crucial to confirm its uniqueness. In this guide, we will outline a series of steps to help you thoroughly investigate the patent landscape and ensure that your app idea remains original and ready for further development. Determining If Your App Idea Has Been Patented:
Prior Art Search:
Begin by conducting a prior art search. This involves searching through existing patents, publications, and online resources to check if a similar app idea has already been patented. You can utilize patent databases like Google Patents, the United States Patent and Trademark Office (USPTO), or other global patent offices’ databases.
Consult a Patent Attorney:
In your quest to learn how to patent an app idea, it’s essential to enlist the expertise of a patent attorney or a professional patent search service. They have the knowledge and experience to perform comprehensive searches, ensuring you don’t overlook any potential similar patents.
Keyword Searches:
Use relevant keywords and phrases that describe your app’s core features and functions. This will help you uncover patents that might be relevant to your idea.
Classifications and Categories:
Patents are organized into specific classifications and categories based on their subject matter. Understanding the relevant classification for your app idea can aid in a more targeted search.
In-Depth Analysis:
Review any patents that appear to be similar to your idea. Pay close attention to their claims, which define the scope of protection. If the existing patents don’t cover precisely what your app aims to do, there might still be room for your unique concept.
Global Search:
If your app has international potential, such as when considering How to Patent an App Idea, don’t limit your search to a single country. Explore patent databases from various countries to ensure comprehensive coverage.
Non-patent Literature:
Besides patents, explore non-patent literature, such as academic papers, industry publications, and technical documentation. Sometimes, similar concepts may exist in these sources.
Professional Assistance:
If your app idea is complex or potentially groundbreaking, consider hiring a patent attorney to conduct a thorough and professional patent search. They can provide valuable insights and guidance.
Suppose your app has international potential, such as when considering How to Patent an App Idea, don’t limit your search to a single country. Explore patent databases from various countries to ensure comprehensive coverage.
How to patent an app idea in 7 steps
So, you’ve conceived a groundbreaking mobile app idea, and now you want to ensure it’s protected. You can patent an app idea in just 7 simple steps. Here’s a detailed roadmap:
Step 1: Choose Your Patent Type
First, you need to decide the type of patent you want for your mobile app. There are three main types available: utility, design, and plant patents. Begin by determining which aspects of your mobile app you want to patent:
● Utility Patents
Duration: 14-20 years
In the context of How to Patent an App Idea, it’s vital to note that these patents primarily focus on safeguarding the core functionalities of your app. This includes unique algorithms, processes, features, and technical components such as data structures and hardware integrations.
● Design Patents
Duration: 14-20 years
If the aesthetics of your mobile app’s user interface (UI/UX) and logo design are central to its appeal, you can obtain a design patent to protect its visual charm.
● Plant Patents
Duration: 20 years
Individuals who invent, discover, and asexually reproduce a new and distinct plant variety receive a type of intellectual property protection known as plant patents. Unlike utility patents, which protect new and useful processes, machines, or compositions of matter, or design patents, which protect the ornamental design of an article of manufacture, plant patents specifically focus on protecting new plant varieties.
To qualify for a plant patent, the following criteria must be met:
Novelty: The plant variety must be new, meaning it has not been previously known or available to the public. It should be different from any existing plant varieties.
Distinctiveness: The plant variety must be distinct from other known varieties. It should have unique characteristics that set it apart from existing plants.
Asexually Reproduced: Plant patents are granted for plants that are asexually reproduced, which means they are not reproduced from seeds but through methods like grafting, budding, cutting, or tissue culture.
Non-Obviousness: The new plant variety should not be an obvious variation or extension of an existing plant.
Plant patents protect the inventor for 20 years from the date of filing, during which they have exclusive rights to propagate, sell, use, and how to patent an app idea the patented plant. After this period, the plant variety enters the public domain, and others are free to use and propagate it.
Step 2: In-Depth Patent Research
Before you embark on the patenting journey, it’s essential to conduct thorough research. This serves as a guide to discover idea patented, so that you may add innovations to it. This involves:
Identifying any existing patents related to your app concept.
Gaining insights into the patent application process.
Perform global research about your app idea.
Having no similar patent idea can help you increase your chances of getting your idea patented.
Step 3: Consult a Patent Lawyer
Considering how to patent an app idea, Navigating the legal intricacies of patent applications can be complex. It’s highly advisable to consult a qualified patent attorney, especially one with expertise in software patenting. A patent lawyer will help you file, prepare, and file your patent application. Below is a checklist on what to include in a patent application:
The Invention
You’ve come up with a fantastic mobile app idea, something no one has seen before. You’ve found a way to make people’s lives easier, more enjoyable, or more efficient. That’s your invention, and it deserves protection so this needs to be the top priority in your application.
How Your App Works
Your app’s inner workings are like the secret sauce of a famous recipe, only you know it which make it second on the list. It’s the magic that makes everything happen. When you tap a button, swipe a screen, or see results in your app, there’s a complex system behind it.
Visual Aids
Think of diagrams and drawings as your app’s blueprints when considering how to patent an app idea. They help explain how your app functions. These visuals can be instrumental in illustrating your app’s unique features to patent authorities.
App Design
Your app’s design is like its personality. It’s not just about how it looks, but also how it feels to use. It’s the user interface, the colors, the layout – everything that makes your app user-friendly and enjoyable.
Step 4: Prepare Patent Documents
While this step can be paperwork-intensive, it’s crucial to provide a robust foundation for your patent application. Your application should comprise the following elements:
Specification: A detailed description of your invention.
Declaration of Your Invention or Oath: A formal statement affirming your invention’s originality.
Data Disclosure Statement: When considering how to patent an app idea, it’s crucial to investigate any prior disclosures related to your invention.
Entity Status Form: A document confirming the legal entity filing the patent.
Claims: Explicitly defined statements that detail the scope of protection sought.
Application Data Sheet: Administrative details about the application.
Drawings: Visual representations to enhance understanding.
Patent Cooperation Treaty (Optional): For international patent filings.
Cover Sheet: Administrative information about the application.
Fee Sheet: Breakdown of the required fees.
Application to Make Special (Optional): If applicable.
Step 5: File Provisional or Non-provisional Patent
Decide whether you will file a provisional or non-provisional patent application, depending on your specific requirements and timeline. We have discussed them above; you can revisit them before making any considerations. There are different fee schedules for each patent available on USPTO.gov.
Step 6: Address Patent Officer’s Comments
When you’re navigating the process of how to patent an app idea, it is important to keep track of the progress of your patent application after filing it, and check if any actions have been taken on it. During the review process, patent examiners may ask for further explanation or changes regarding the invention information provided.
To increase the chances of your patent being approved, it is recommended to be proactive in responding to such requests. This will create a positive impression and show your commitment towards obtaining the patent.
Step 7: Keep Up with Maintenance Fees
Once the patent office grants your patent, as discussed in ‘How to Patent an App Idea,’ you must pay ongoing maintenance fees to maintain its validity. Given the complexity and time-consuming nature of this task, consider engaging a professional to manage your patent’s maintenance.
How much does it cost to patent a mobile app?
The cost of patenting a mobile app isn’t set in stone; it varies depending on several factors. Key influencers include the type of patent, the complexity of your invention, the extent of geographic protection, attorney fees, patent office charges, patent searches, prior art analysis, ongoing maintenance, and more.
Breaking it down further, these costs can be categorized into various segments, including:
Application filing
Patent search
Patent examination
Issue and publication
Patent maintenance
Miscellaneous
Post-issuance
Patent Trial and appeal
Patent petition
Patent service fees
Patent enrollment and more.
In a ballpark estimate, the tab for a provisional patent application can range from roughly $2,000 to $5,000. Conversely, a non-provisional patent might set you back between $10,000 and $15,000.
Therefore, when considering How to Patent an App Idea, it’s worth noting that your patent application goes through a rigorous evaluation process that can span several years to determine if it qualifies for patent protection.
Not every app owner should patent their app. Why is that?
Why Patenting May Not Suit Every App Owner, here are some points that may help:
Cost and Time Intensive: The patenting process, including research, documentation, filing, examination, and other steps, can be both time-consuming and expensive. These demands on resources make it unaffordable for many.
Uncertainty: Even after significant investment in a patent lawyer, documentation, and filing fees, there’s no guarantee of approval for your application.
Disclosure: Filing a patent application exposes your mobile app idea to the public, potentially granting competitors access to your concept, although it’s not guaranteed.
Enforcement Challenges: Enforcing a patent can be tough and costly. App owners may face difficulties when trying to protect their patent rights against third parties due to complex and time-consuming patent infringement lawsuits.
Alternatives to App Patents
As an app owner, patents offer great benefits. However, there are alternative protection options available.
Copyright Protection
Copyright safeguards a wide array of creative works, including literature, art, music, and computer programs. By securing the copyright for your mobile app’s idea, code, and visual elements, as discussed in How to Patent an App Idea, you gain the ability to prevent unauthorized reproduction, distribution, and copying of your intellectual property.
Trademark Protection
Trademarks are an excellent alternative for protecting app-specific elements like content, logos, icons, and other distinguishing features. They prevent others from using these elements in a way that could confuse consumers, preserving your app’s unique identity.
Non-disclosure Agreements (NDAs)
NDAs are a legally binding alternative that can be established with your mobile app development partners. By having them sign an NDA, you ensure the confidentiality of your project details, safeguarding your innovative ideas and concepts from potential imitation.
In summary, app patents are not the sole option for protecting your intellectual property, especially when considering how to patent an app idea. Copyright, trademarks, and NDAs provide distinct and effective means to secure your mobile app’s creative assets and unique features.
What Does TechnBrains Indorse?
Patenting your app idea may seem challenging, but it’s essential if you believe in its potential. It’s a way to safeguard your innovative concept and protect it from being replicated or stolen. When it comes to How to Patent an App Idea, while the process might appear complex, it’s far less burdensome than dealing with copycat apps infringing on your ideas or facing a patent infringement lawsuit.
If you require assistance with mobile app patent research or documentation, TechnBrains is here to support you. We offer guidance not only in patenting but also throughout the mobile app development process, ensuring your world-class invention remains protected.
FAQs on Patenting an App Idea
What if my app idea is already patented?
If you find that someone else has patented your idea, don’t lose hope. Thoroughly study the existing patent and brainstorm ways to differentiate your app from it. Refining and innovating your idea can make it unique and better.
How long does it take to patent a mobile app?
The time to secure a patent for your mobile app varies based on factors such as the uniqueness of your idea, the clarity of your documentation, the expertise of your patent attorney, and more. Rejections and re-submissions can extend the process so that the timeline may span several years.
How long can you hold the patent for your mobile app idea?
Generally, you can retain mobile app patent rights for 20 years. However, specific rules apply, such as Utility Patent Protection for 20 years and Design Patent Protection for 15 years from the date of issuance, according to U.S. patent office regulations.
How can an I.T. company assist in patenting your mobile app idea?
I.T. companies play a crucial role in the patenting process. They provide support with technical documentation, prior art research, market analysis, prototype development, assessing patentability, crafting an intellectual property strategy, ensuring protection, and driving innovation and improvement.
Can you patent an app idea and generate income from it?
Yes, patenting an app idea opens doors to revenue opportunities. You can monetize it by selling or licensing the patent or even selling the app itself.
Which countries offer patent services for mobile apps?
Patent services for mobile apps are available in several countries, including the United States, European Union, United Kingdom, Canada, Australia, Japan, China, South Korea, India, and Brazil.